When you install and WordPress login for the first time, you may notice some dummy data posts and comments. It’s essential to delete this data and also make necessary settings update.
In this article, I’m going through a walk-through of the Dashboard and also necessary first-time setup after WordPress login.
WordPress is powerful blogging software that provides us with complete control over it. It follows the template and plugin architecture that helps to supercharge further.
WordPress is an open-source program, and its core code is available freely, making it susceptible to hacking, spamming, and security issues. However, it’s backed by a vast community of developers striving to make it most secure and sustainable.
If you’re following our #WordPressBlog series, this is the second article and video published. We previously posted about how to install WordPress with a powerful LEMP stack.
Let’s dive into the post to learn WordPress login, dashboard walk-through, and preliminary setup —
WordPress Login for First-Time
If you’ve just installed a WordPress blog on the cloud server and are confused about how to log in to WordPress. Just follow the below steps:
- Access the wp-admin folder in the web browser, like:
- http://example.com/wp-admin/ or whatever your domain name
- in my case, I will be accessing – http://demo.restorebin.com/wp-admin/
- You will be navigated to the Login page and prompted with a login Username and Password
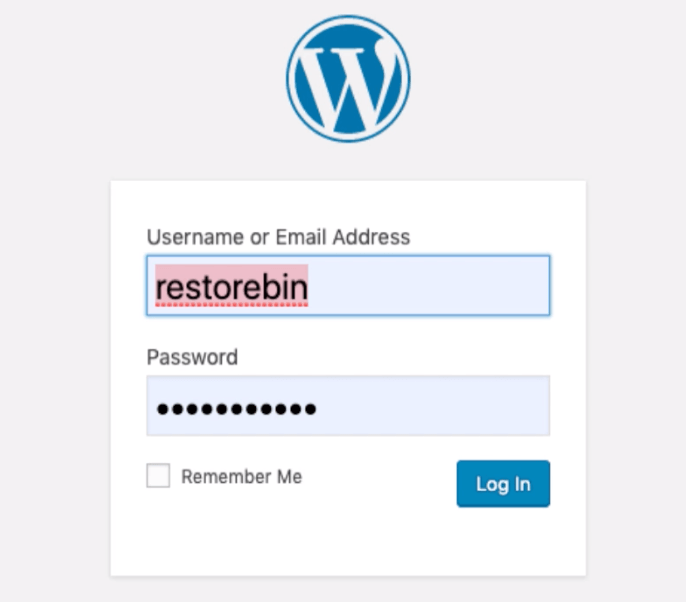
- Enter the Username and Password that we have set up while Installing WordPress with LEMP
- Click on the [Login] button to redirect WordPress Dashboard
You’ve successfully logged into your WordPress CMS.
WordPress Dashboard Walk-Through
This section is intended for WordPress beginners. You can skip this section if you already know about the WordPress dashboard and tabs.
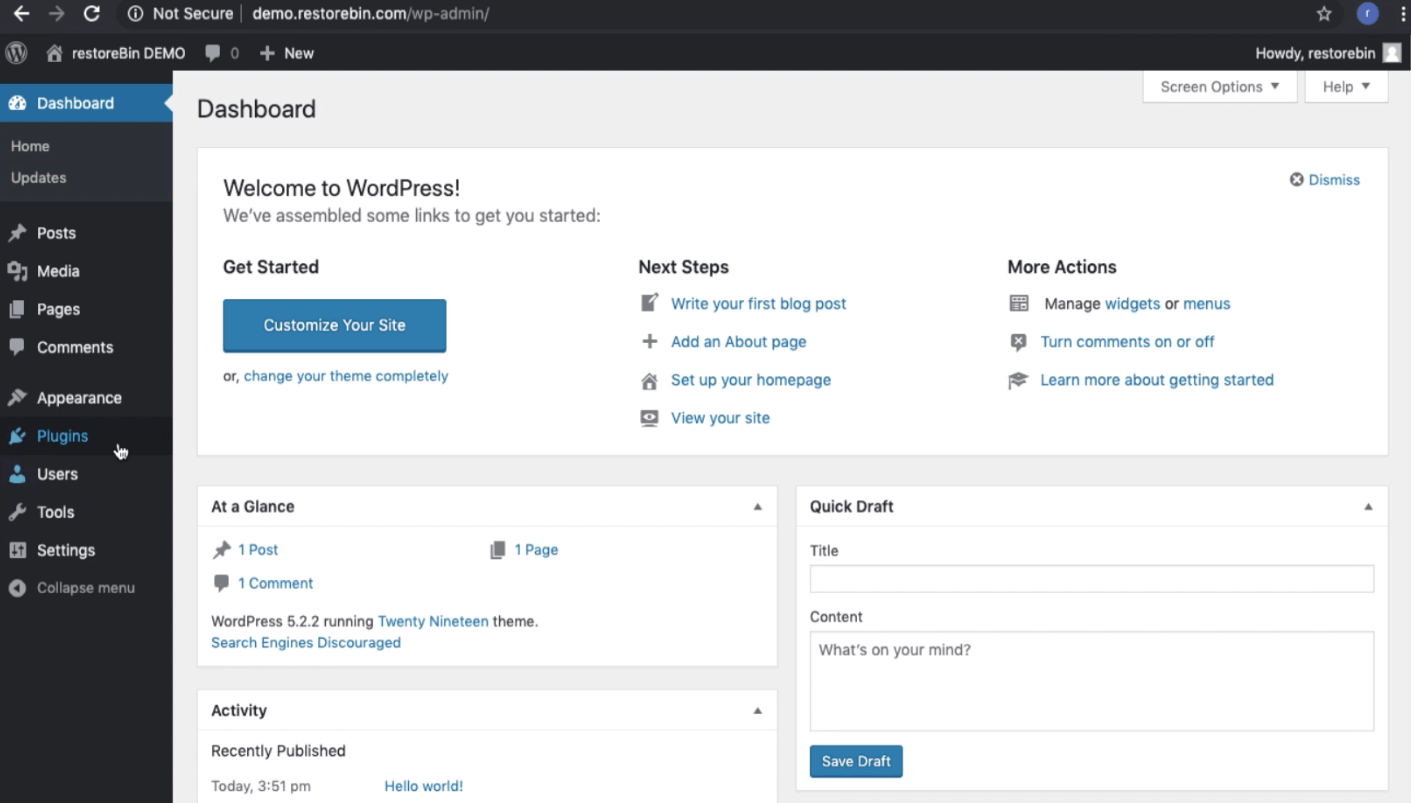
- Dashboard — When you log in to WordPress, you’re navigated to Dashboard. This is a home for the WordPress admin. You can have an idea about the total post, pages, and comments and even save a quick draft.
Some plugins also drop in a few widgets that appear on the Dashboard. - Posts — WordPress CMS is mainly used for Blogging purposes, and the Post tab helps create, publish, and segregate the blog post under Categories and Tags.
Post section list all the published, pending, and draft post in WordPress, which you can revisit and modify per needs. - Media — While creating a blog post, WordPress can upload the media such as images, videos, PDFs, etc. You can view and manage the entire WordPress media library under this tab.
- Pages — Posts are used for publishing the blogging content regularly, while the Pages are the static post that will hardly change. The Pages can be About Us, Contact Us, Business or Services, etc., which won’t change regularly.
- Comments — As the name defines, these are the comments we receive in the comment box under each blog post. You can completely manage the comments by responding, editing, marking them as spam, and deleting the useless comments.
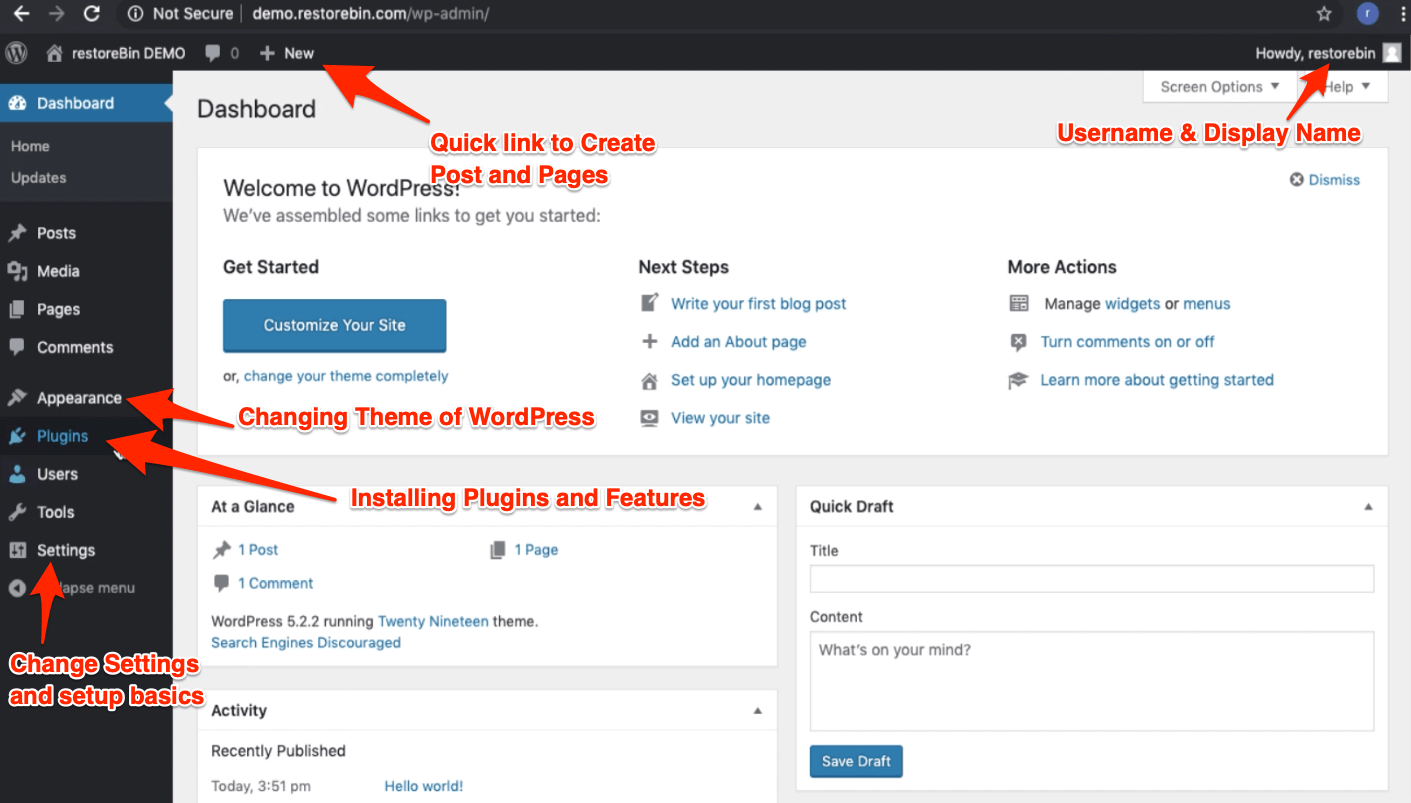
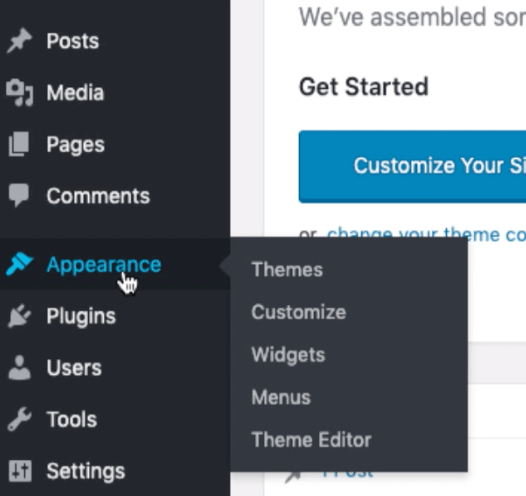
- Appearance — You can edit WordPress’s look and feel in this section. You can change the theme, upload external theme files, and also customize the different types of templates in HTML & PHP in the built-in editor.

- Plugins — WordPress is powered by unlimited plugins or extensions that help unlock different features that are not available by default. You can search a Plugins from the WordPress repository and also upload the custom Plugins of your own or download them from external sites.
- Users — As an Administrator of WordPress CMS, you can manage the users and their permissions from the Users tab. You can also modify your profile and setup.
- Tools — WordPress is pre-installed with a few essential tools like importing & export the blog, health check-ups, and exporting or erasing the personal data collected.
- Settings — The WordPress main settings section allows you to modify and adjust the entire WordPress installation. There are different sub-menus under the Settings tab based on the settings needed.
Preliminary Settings after WordPress Login
As mentioned earlier, the WordPress installation comes in with some dummy data, minimal security, and settings that are not favorable for search engines. We need to make these changes immediately after the WordPress login.
Below are the essential action items that need to be taken after the first login.
General Settings
This section has basic information about the website or blog like site name, description, URL, admin mail address, date & time preference, and membership setting.

Based on your needs, you can enable or disable the membership registration. If you allow the registration, anyone can register and access the backend. It’s also essential to set the default user role to the lowest, i.e., subscriber.
Change the date and time per your timezone and also starting of the week.
Discussions Settings
Discussion settings allow managing WordPress commenting options. Here you can enable or disable the comments on the blog post and set up the moderation option like all comments should be approved, at least one comment should be pre-approved, etc.
The discussion settings will also allow configuring the number of comments to appear on a single page. You can even block offensive words if these are used in comments.
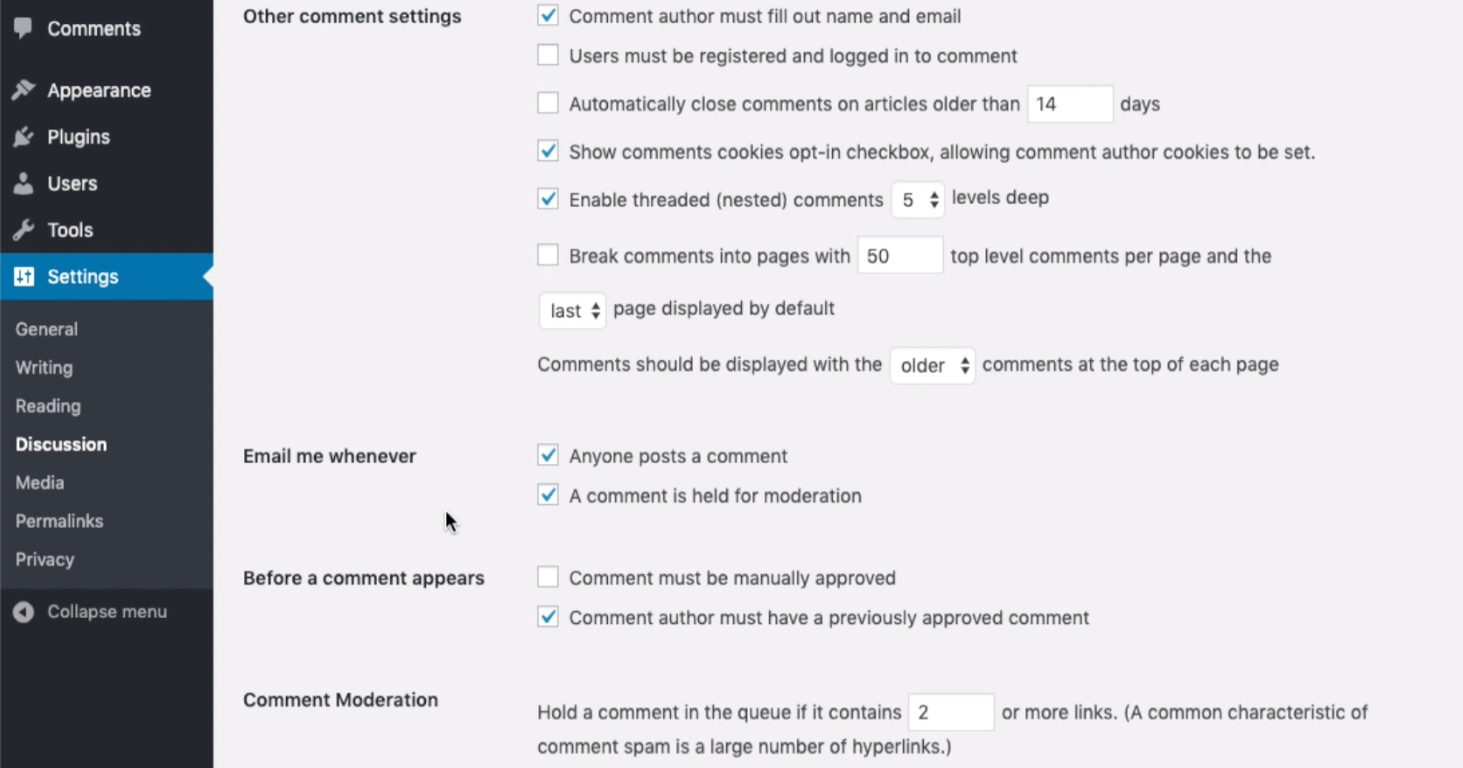
There are quite a few options and settings. Read through thoroughly under Discussion settings and select the best suitable for you.
Media Settings
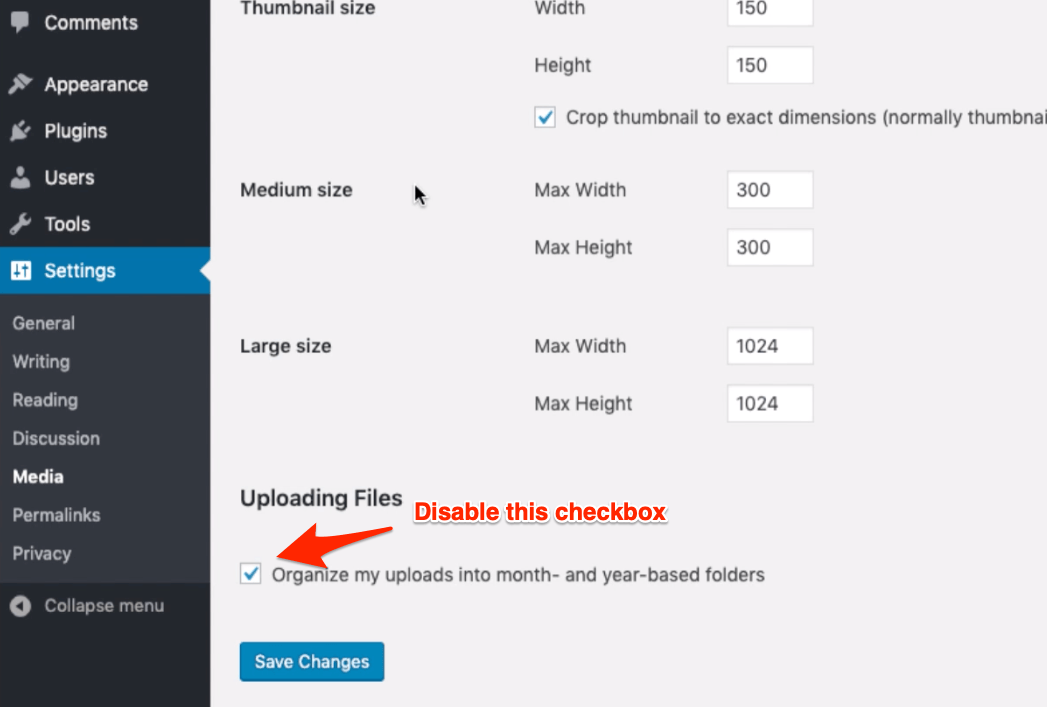
The default WordPress media is enabled to upload the files in Years and Months folders which I think is unsuitable for SEO. Uncheck the option that says — Organize my uploads into month- and year-based folders.
You can also resize the thumbnails and upload image size under the Media settings menu.
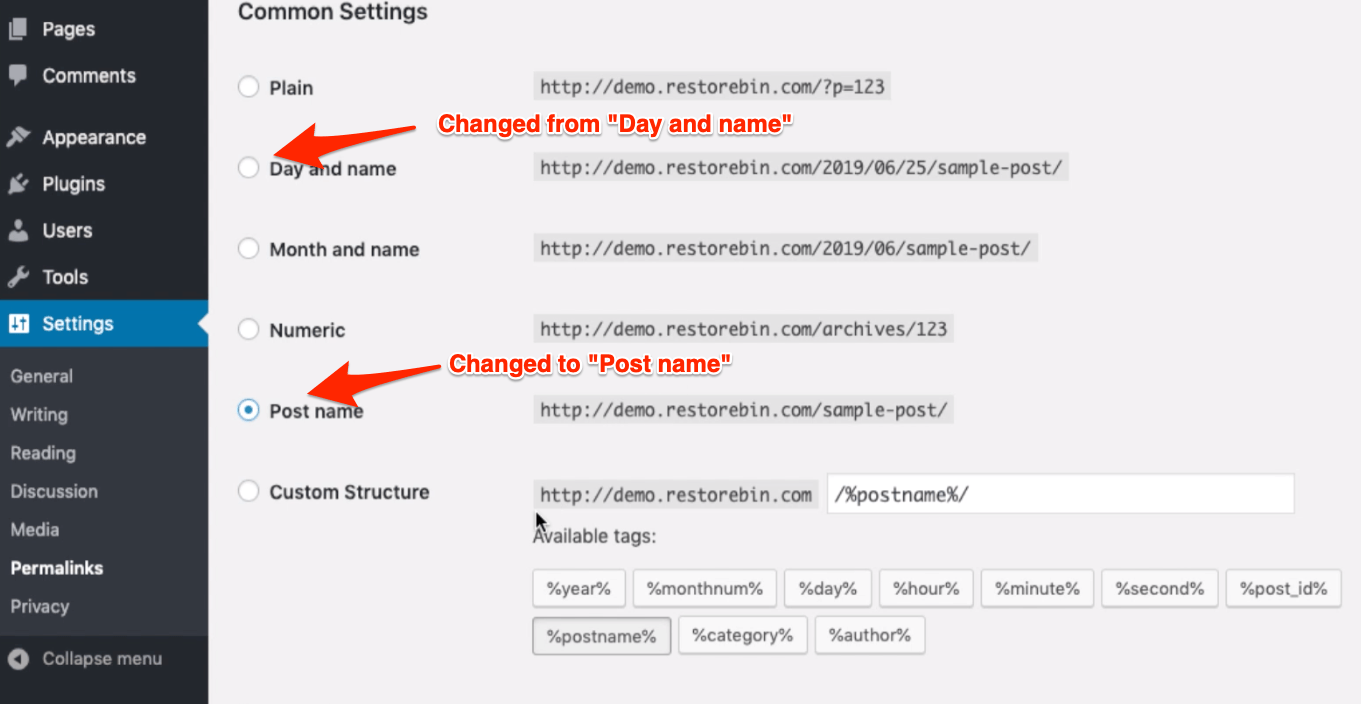
WordPress Permalinks Settings
The default WordPress permalinks are not Search Engine friendly. It just has the number representing the post ID in the WordPress database.
Changing the URL structure to something like /%postname%/ OR /%category%/%postname%/ is suggest for SEO friendly URLs.
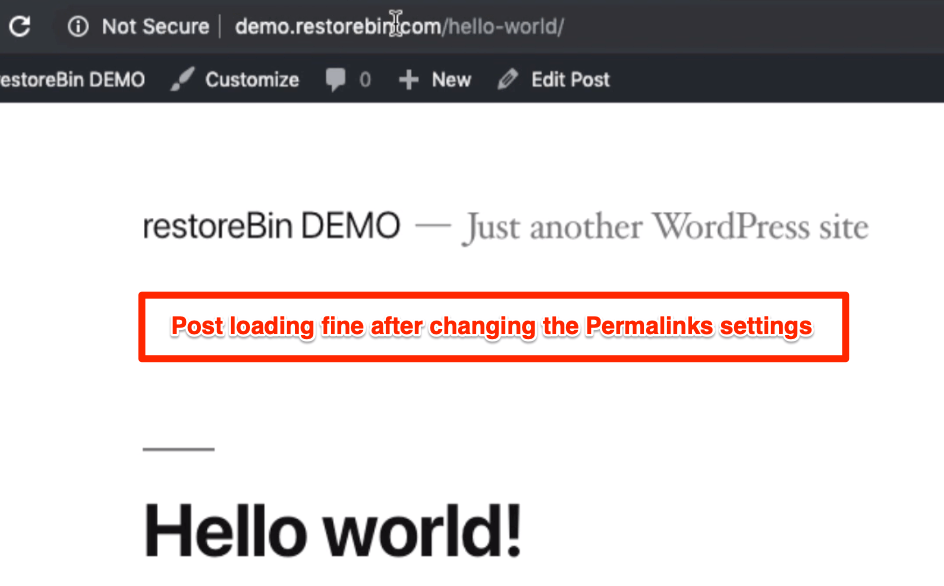
After changing the Permalink Structure, check if your website blog post links are not broken.
Deleting Dummy Data
WordPress is pre-installed with dummy posts, pages, comments, and plugins. This is to give a new user an idea of how WordPress is structured.
You can visit the individual section and delete the dummy data immediately after WordPress installation.
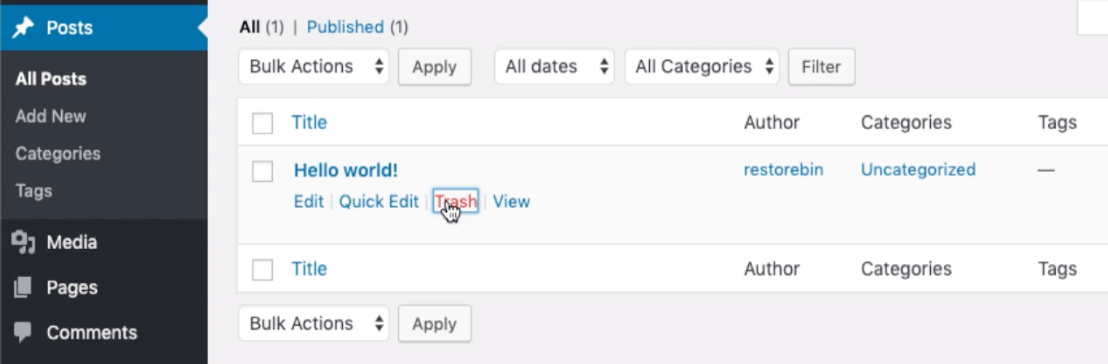
- Delete the dummy Post: Dashboard > Posts menu > All Posts sub-menu > Hit the Trash command under the post title from the list.

- Deleting the dummy Page: Dashboard > Pages menu > All Pages sub-menu > Hit on Trash command under the Page title from the list.
- Deleting the WordPress Comment: Dashboard > Comments menu > Hit on Trash command under comment from the list
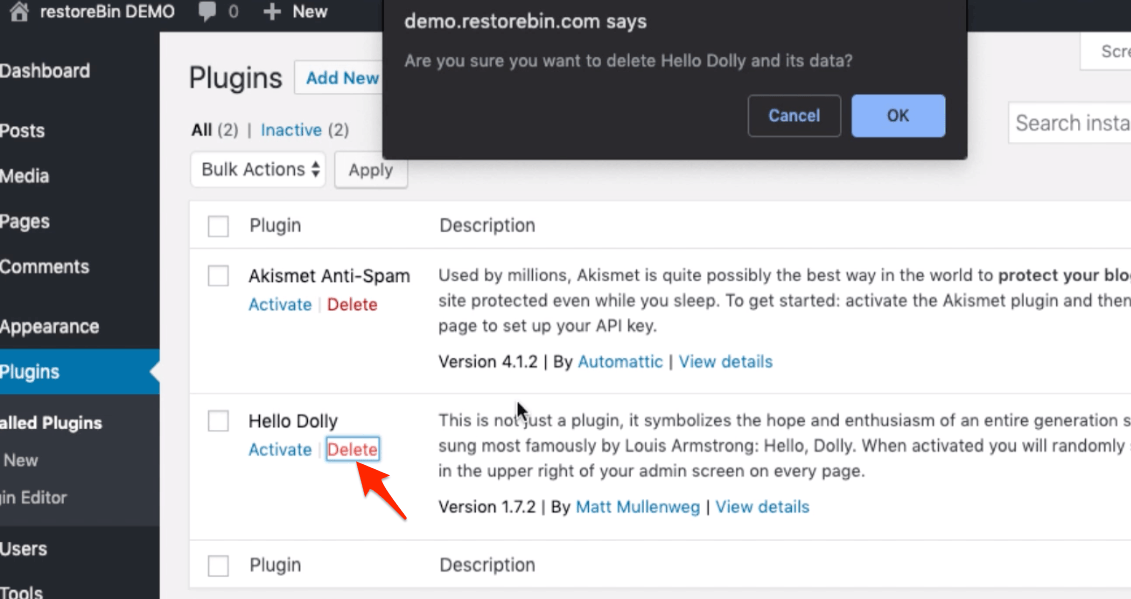
- Deleting the Plugin: Dashboard > Plugins menu > Installed Plugins > Click on Deactivate command under the Plugin name from the list, and after the refresh, Delete it.

We can delete the trashed posts and comments from the Trash tab under each section.
Watch Video Demo of Dashboard and Settings
You can watch the below video demo of the entire WordPress Dashboard walk-through and the Preliminary Settings that need to take care of.
I hope you liked the video; please subscribe to our channel for exciting updates and videos.
What’s next in the #WordPressBlog Series?
Now that you are familiar with the WordPress dashboard and completed the initial settings, we can move ahead with changing the appearance of WordPress.
We will first be learning how to update skin from the WordPress Themes repository and learn how to customize, add header menus, and change the widgets.