Do you know that we also have a firewall for the Ubuntu Cloud server? Just like we have for Windows PC and macOS systems. It’s called Uncomplicated Firewall, i.e., UFW Firewall.
We always hear about the hacks and theft, even for big brands and data companies. Whether a small business in a local or substantial multi-national company, there will always be a fear of data invasion. These firewalls work as a gate pass between the external world and the internal server.
In this article, we will learn how to install and configure the UFW firewall to allow only Nginx HTTPS and SSH connection to the Cloud Server.
If you follow, this is the sixth article and video demo of the #CloudServer series. We recently published about LetsEncrypt setup for Nginx with a free SSL certificate.
Let’s dive into installing and configuring the UFW firewall for the LEMP Stack server —
What is the UFW Firewall?
The default firewall configuration tool for Ubuntu is ufw. Developed to ease iptables firewall configuration, ufw provides a user-friendly way to create an IPv4 or IPv6 host-based firewall.
Once we define the rules about whom to ‘allow’ and ‘deny’ connection, a firewall kicks out all other invalid access to the network.
Install UFW Firewall on Ubuntu
you can easily install the UFW firewall using the below command in SSH.
sudo apt install ufw
Once you’ve completed the installation, you can check the status of whether UFW is active or not using the below command.
sudo ufw status
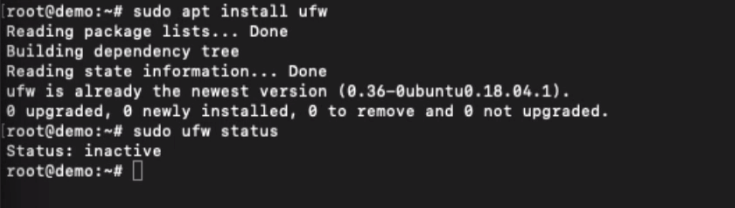
If the firewall is active, you can view all the existing rules using the above command. Something like the below:

Enable IPv6 Support for UFW Firewall
The UFW is default enabled for IPv4; however, you can enable the support for IPv6 by editing the default folder. This is not mandatory unless you need it.
sudo nano /etc/default/ufw
Once in the editor mode, find the IPV6 line and modify it to reflect as below.
IPV6=yes
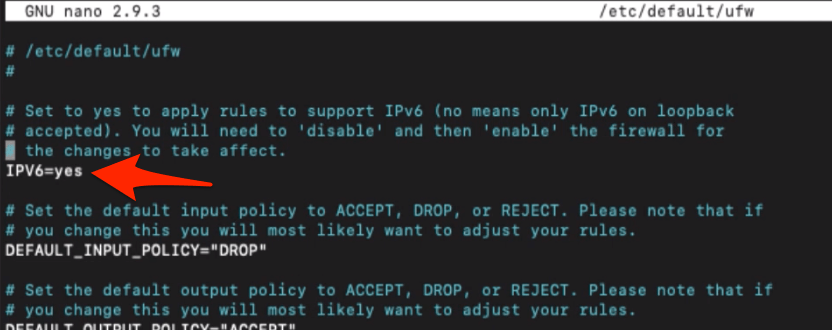
Close the editor once the change is done.
Setup Default policies for Connections
The default UFW policy only allows the outgoing network connection and disable all incoming connection. This means no outsider can connect to the server unless you have allowed it. But, any internal system can connect to the outside world.
This helps overall network security and eliminates unauthorized login. Using the below command, you will default to UFW settings to the originals.
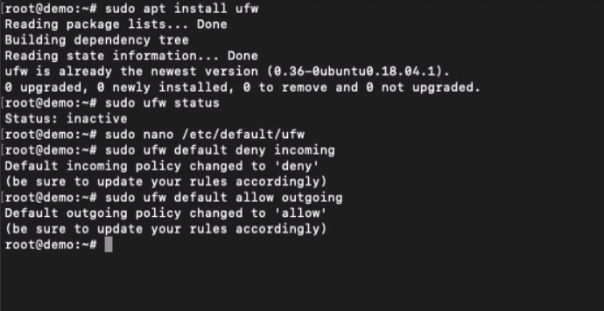
Run the first command to deny any incoming connections.
sudo ufw default deny incoming
And this second command will be helping to allow all the outgoing connections only.
sudo ufw default allow outgoing
Allow UFW connection for SSH/SFTP.
Since we have denied all the incoming connections, we need SSH to connect our server remotely.
To allow the SSH connection, just run the below command.
sudo ufw allow SSH
Suppose the above command doesn’t work. You can alternatively allow the connections to PORT 22 using the below command.
This can also allow the SSH and SFTP connection to the Ubuntu Cloud server.
sudo ufw allow 22
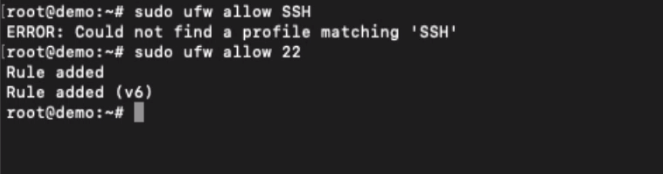
You will now be able to connect SSH and SFTP safely.
Allow UFW Firewall for Nginx
We have allowed the SSH & SFTP connection; next, we will be allowing the connection of all the incoming and outgoing for our web server, i.e., Nginx.
Using the below command, you can run the below command to allow all HTTP and HTTPS incoming and outgoing connections to the Nginx web server.
sudo ufw allow 'Nginx Full'
However, if you want to enable the HTTP connection, i.e., the connection to port 80, then you can allow it using the below command.
sudo ufw allow 'Nginx HTTP'
Lastly, if you’ve SSL encrypted connection to the web server, you can allow the HTTPS to Nginx using the below command.
sudo ufw allow 'Nginx HTTPS'

This will open the connection only to port number 443 for a secured connection.
Enable and Disable the UFW Firewall
We can easily enable the UFW Firewall on Ubuntu using the below command:
sudo ufw enable
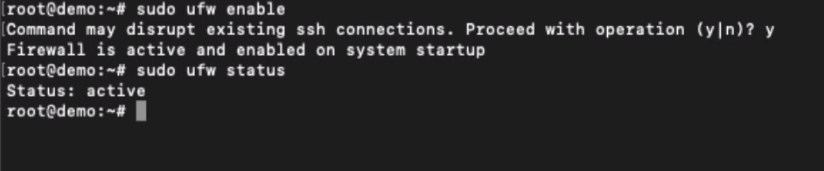
To disable Firewall protection, you can run the below command:
sudo ufw disable
Watch the video demo of UFW Firewall Setup
Watch the video of setting up the UFW Firewall on connections for Nginx HTTPS and SSH connections.
I hope you liked the video and found it helpful. Please subscribe to our channel.
What’s next in the #CloudServer series?
You’ve learned how to set up the UFW Firewall; next, we will add some additional Nginx security snippets. It will make the server security stronger and prevent hackers from injecting cross scripts.