Hello everyone, I hope you’re doing great today! The following article is a complete setup and installation guide for WordPress on the DigitalOcean cloud server. I’ve also included the video demo for ease of understanding.
Firstly, if you’re reading this article, I don’t think you need an introduction to what WordPress(WP) is all about.
Secondly, the DigitalOcean (DO) is one of the best and fastest-growing cloud hosting service providers; I use DigitalOcean to power up this restoreBin blog.
With DO, you can spin a cloud server (known as Droplet) in less than a minute! If you’re new to Cloud Server, then signup for an ultra-fast cloud webserver at DigitalOcean; you’ll also get a $100 free credit using this link.
Let’s start with our complete end-to-end guide on installing WordPress on DigitalOcean. I’d suggest bookmarking (Ctrl+D) this page for your future reference. I will be updating this article now and then.
Note: The post has been updated to support the latest PHP version, however, the screenshot/images still reflect the older version.
Sign up and Create a Droplet
The very first thing that you need is to create an account at DigitalOcean and spin a droplet. The steps are pretty straightforward.
Steps to Sign up DigitalOcean with free $50 credits:
- Go to DigitalOcean (special link with $50 free credits)
- Hit the [Sign up] button on the Home Page
- Enter your Email Address and desired Password, OR you can even register with Google or GitHub Account using SSO.
- Verify your Email ID (not required for SSO)
- Enter the Payment details; Credit Card or PayPal (Do not worry! you won’t be charged until credits are used or expired)
- And finally, log in to your DigitalOcean dashboard.
You’ll be asked some basic questions along with the project name and other details. You can refer to this DigitalOcean registration guide for further details.
Steps to Create Droplet for WordPress:
Once you’re into the DigitalOcean dashboard console, follow the below steps to spin a droplet server.
- Hit on Create Droplet
- Select the latest Ubuntu OS 20.04 (the current stable version while writing this post)
- Choose Droplet Size. I recommend using at least 1 GB RAM for smooth functioning.
- Select Data Center (based on targetted region/country)
- Select Additional Option (if required – not necessary for WordPress)
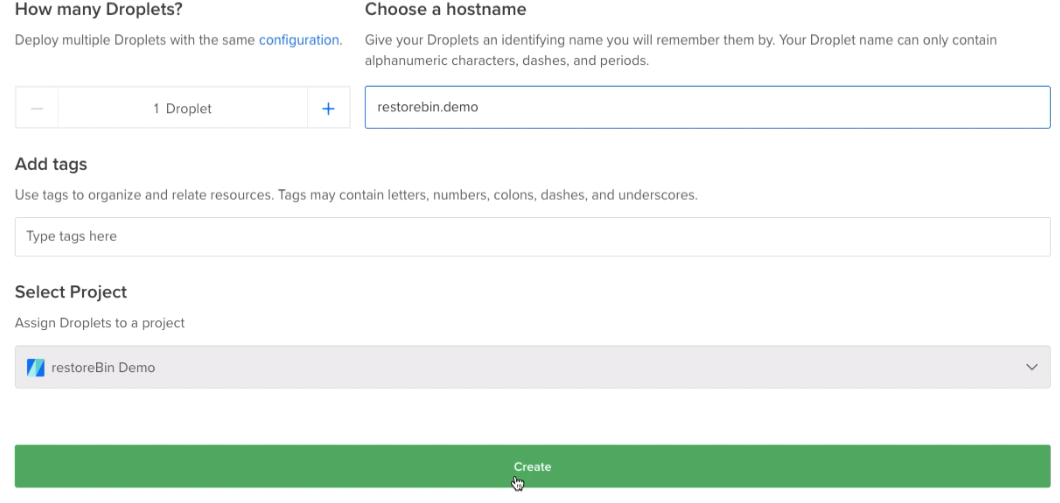
- Number of Droplets: 1
- Hostname: yourdomain.com (or anything you name it!)
- Hit on Create button
You’ve now signed up for an account and created a primary droplet to host WordPress. You can refer to this detailed guide on DigitalOcean Droplet Creation and get free credits.
Watch the Video Tutorial on DigitalOcean Sign up and Droplet Creation for free:
Adding Domain Name and Configure DNS settings
Currently, DigitalOcean doesn’t have a domain registration feature. So you need to buy the domain outside and point the nameservers towards DigitalOcean’s NS for managing the DNS setting within DO.
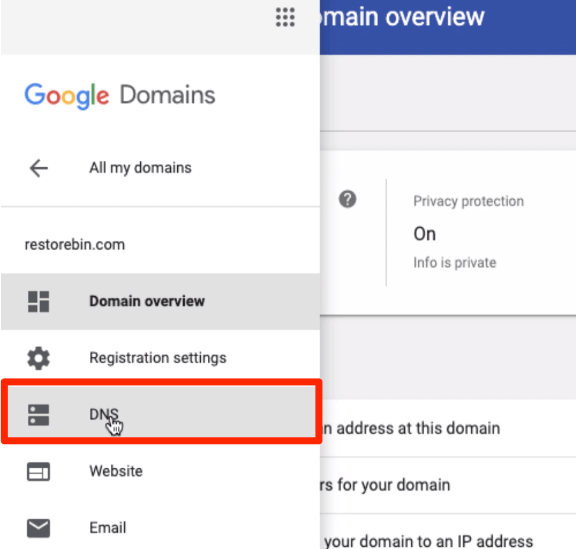
I prefer using Google Domains as this is one of the most reliable and authenticated domain name registrars. The registration steps are pretty simple and almost correlated with any registrar site.
- Search for desired Domain Name on domains.google.com
- Check the availability of a domain
- Add to Cart (if the domain name is available)
- Check out with free Privacy Protect add-on
- Complete payment transaction
- Visit your Domains section, and your domain will be available in the portal.
How to Add Domain Name in DigitalOcean?
Once the domain name is available in your registrar’s dashboard, you need to point the Name Server towards DigitalOcean to manage the domain name from the DigitalOcean dashboard.
Visit your registrar domain name settings and modify the Name Server(NS) to point towards DigitalOcean nameserver with below values:
- ns1.digitalocean.com
- ns2.digitalocean.com
- ns3.digitalocean.com
The DNS changes may take a while to reflect into your account. Meanwhile, we can proceed with further setup.
After adding the NS to point towards DO, we will attach the domain name to the droplet. Hence, it would be easier for us to remember the domain name instead of a server IP address.
Follow these steps to add the domain name in DigitalOcean networking:
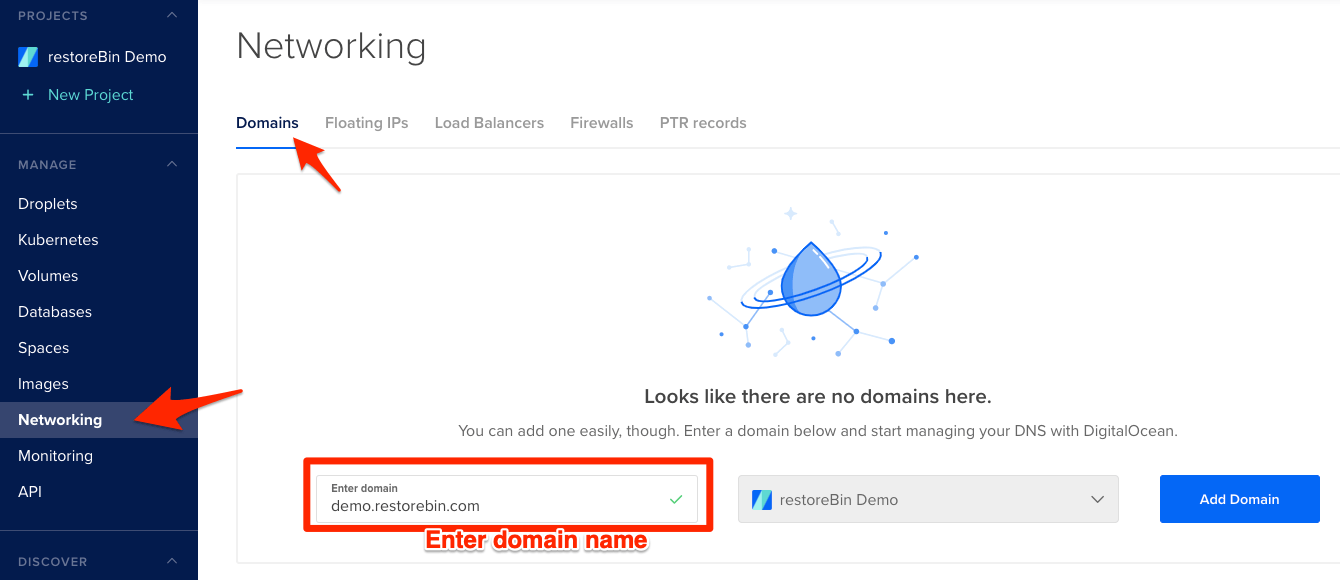
- Login to the DigitalOcean dashboard
- Navigate to the Networking tab on left-sidebar
- Switch to the Domain tab
- Enter the domain name (example.com)
- Select the Droplet from the drop-down (if you’ve multiple droplets)
- Hit on Add Domain
- The domain name will start appearing
Your domain name is now successfully added, and you’ve on the Domain Name Server (DNS) settings page.
Setup DNS settings in DigitalOcean
Once you’re on the Domain Name Server settings page, you can add different types of records like A, AAA, CNAME, MX, TXT, SRV, and NS. Managing the DNS records in DigitalOcean is simple, and you can also verify whether the changes be reflecting in the Zone file (at the bottom of the same page).
Here are a few DNS settings that I think you should consider adding:
| Record Type | Value | Point to |
| CNAME | www | example.com. |
If you’re looking to set up your business, then consider signing up for Google WorkSpace with a 20% discount code and add the following records:
| Record Type | Value | Point to |
| MX | 1 | aspmx.l.google.com. |
| MX | 5 | alt1.aspmx.l.google.com. |
| MX | 5 | alt2.aspmx.l.google.com. |
| MX | 10 | alt3.aspmx.l.google.com. |
| MX | 10 | alt4.aspmx.l.google.com. |
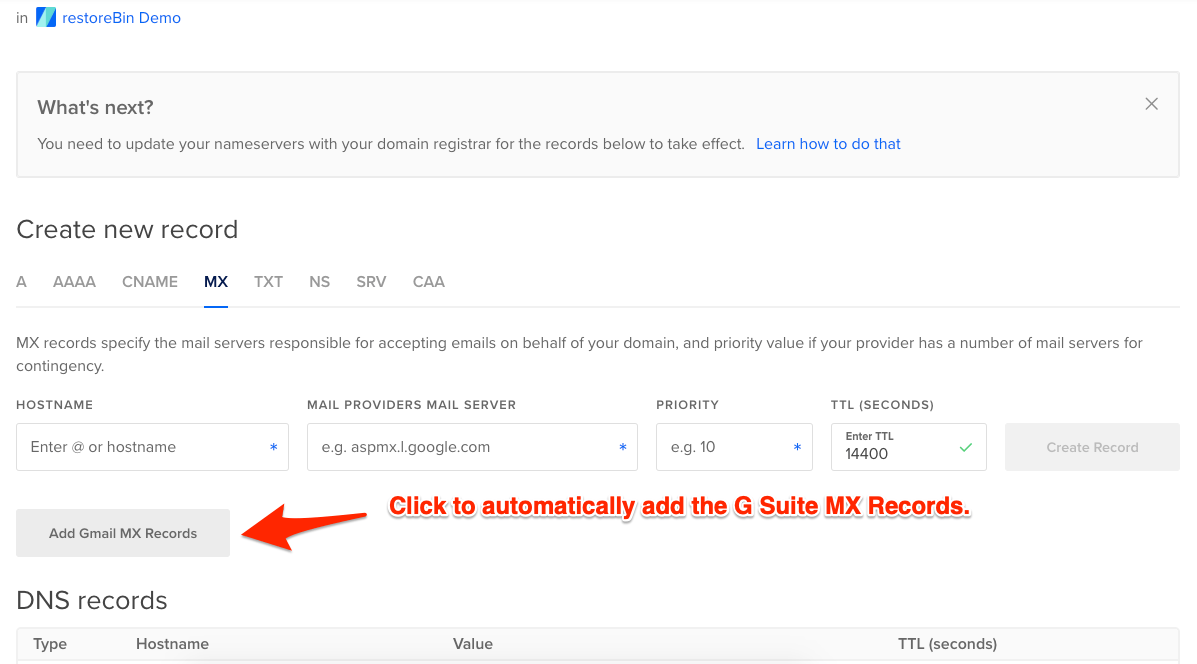
Alternatively, you can just hit the button [Add Gmail MX Record] to automatically add these into DNS settings.
We have successfully set up the Domain name configuration with our DigitalOcean Droplet.
Login into Droplet and Setup a LEMP Stack
Next, you need to install a powerful LEMP Stack on Cloud Server.
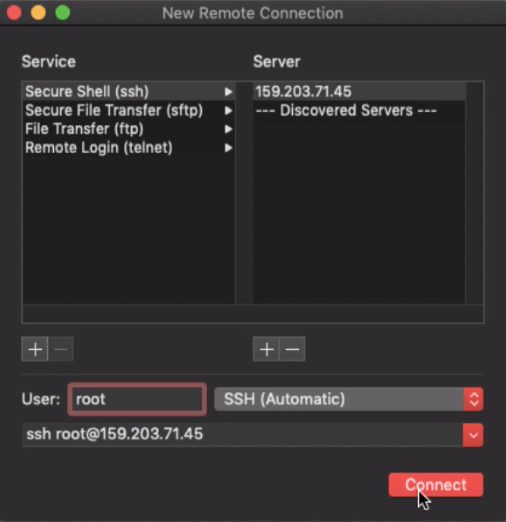
We need an SSH connection terminal for further installation. You can use the PuTTY client available for Windows OS; for macOS, you can use the built-in terminal and configure the remote connection.
Login to Cloud Server via SSH connection with the credential you’ve received in the email after creating the droplet.
- Enter the IP address of the droplet server
- Use port as 22
- Click Connect button
- The terminal will start connecting to the cloud server
- Enter the Username that you’ve received in the mailer (default is root)
- Enter the password (invisible while typing)
- You’ll be logged into the Ubuntu Cloud droplet
Next, we would be installing the Nginx, MySQL, and PHP (known as LEMP Stack) on the droplet as these are mandatory pre-requisite for WordPress functioning.
Install and Configure Nginx Webserver for WordPress
Nginx is currently one of the best lightweight web servers for the web hosting server. We can install Nginx easily with a few command lines from Ubuntu’s APT repository.
Execute these commands in the terminal for Nginx installation:
sudo apt-get update
sudo apt-get install nginx
sudo service nginx restart
These commands will install and restart the webserver on Cloud.
To check whether Nginx is installed on our server, type the IP Address in the browser URL. Since we already added the domain name, you can also visit the domain name address.
http://server.ip.address
OR
http://your-domain-address.com

You will be able to see an Nginx default welcome page.
You can refer to the Powerful Nginx installation on LEMP Stack for extensive details.
Installing PHP Processor in DigitalOcean droplet
It’s always good to install the latest PHP processor and FastCGI to process the dynamic request from WordPress. We will install the latest PHP 7.4 version.
Run the following command via SSH to install the PHP Processor on Cloud:
sudo apt-get update
sudo apt-get upgrade
sudo apt-get install software-properties-common
sudo add-apt-repository ppa:ondrej/php
sudo apt-get update
sudo apt-get install php7.4 php7.4-cli php7.4-common php7.4-fpm php7.4-curl php7.4-mbstring php7.4-mysql php7.4-zip php7.4-xml php7.4-gd php7.4-intl php7.4-soap

These commands will install the PHP7.4 version and the standard necessary modules. We have also added a PHP repository to get frequent updates for the developer.
For more details, read a complete setup guide for PHP Processor on Ubuntu Cloud Server OS. This guide also has an advanced setup to improve PHP processor security.
We will also need to adjust the Nginx configuration for PHP-FPM to enhance the performance and speed up with FastCGI.
Watch the video tutorial on setting up a powerful LEMP stack on a cloud server:
Install and Configure MySQL Database for WordPress
Now that the cloud server is running and powered by Nginx and backed by PHP-FPM Processor, the next would be installing the MySQL server.
MySQL is a database management program that WordPress will use to store and retrieve the data whenever requested.
To install the MySQL server’s current default version, execute the below commands.
sudo apt-get install mysql-server php7.4-mysql
This command will install the MySQL server and PHP MySQL supporting modules. However, if you’re looking for the fastest and most well-optimized database server, install MySQL 8.0 version (I recommend this!).
One thing to note, while executing the above command, the system will ask you to set and confirm a password for the MySQL root user. The password can (and should) be different than the droplet password.
Once the MySQL server is installed, run this command to secure the database and lock the data securely.
sudo mysql_secure_installation
Here you will be asked for a MySQL username and password. You are even changing the password; type ‘n’ or ‘no’ if you want to continue using the existing MySQL Password created earlier.
Here comes the essential part — WordPress Configuration needs three variables as a part of MySQL database setup.
- Database name: wpdatabase
- Database user: wpuser
- Database password: wppassword
Login into MySQL server via SSH using root user account:
mysql -u root -p
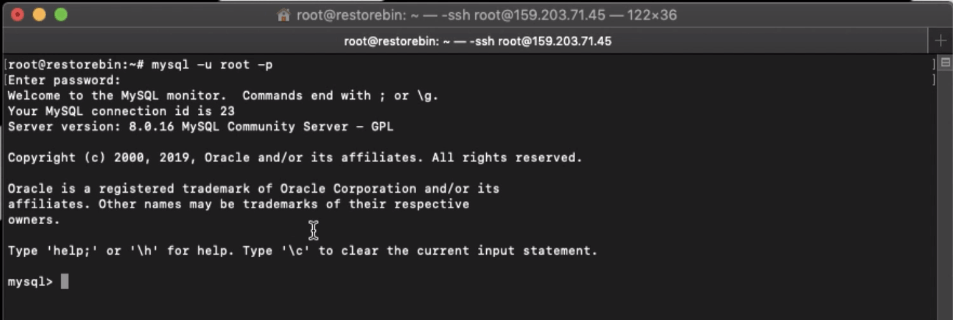
Enter the root user password when prompted.
Next, let’s create the database using the above dummy values mentioned.
CREATE DATABASE wpdatabase;
CREATE USER 'wpuser'@'localhost' IDENTIFIED BY 'wppassword';
GRANT ALL ON wpdatabase.* TO 'wpuser'@'localhost';
FLUSH PRIVILEGES;
exit;
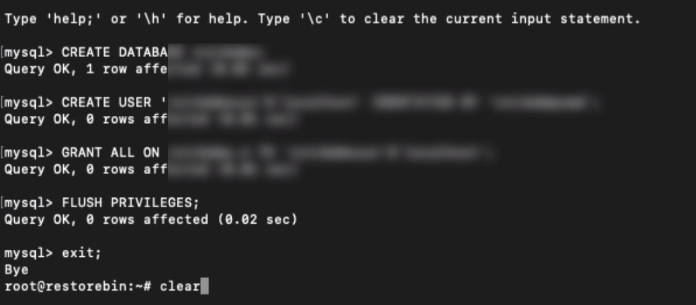
The command will create the database, MySQL user, and password for WordPress. After the last exit;, you’ll be exited from MySQL and back to the SSH shell.
Alert: Do not use the above dummy values; ensure that the live site has unique MySQL credentials.
You can refer to this detailed guide on creating a MySQL database and user for WordPress.
Install WordPress on DigitalOcean
Before we install WordPress, we need to ensure that the Nginx web server configuration is correctly set up to listen to the WordPress domain and root directory.
Configure Nginx for the WordPress directory
We are going to use the default Nginx virtual host file located under /etc/nginx/sites-available/ to listen to our domain name and PHP Processor socket.
Using the SSH client, edit the default configuration file in nano editor:
sudo nano /etc/nginx/sites-available/default
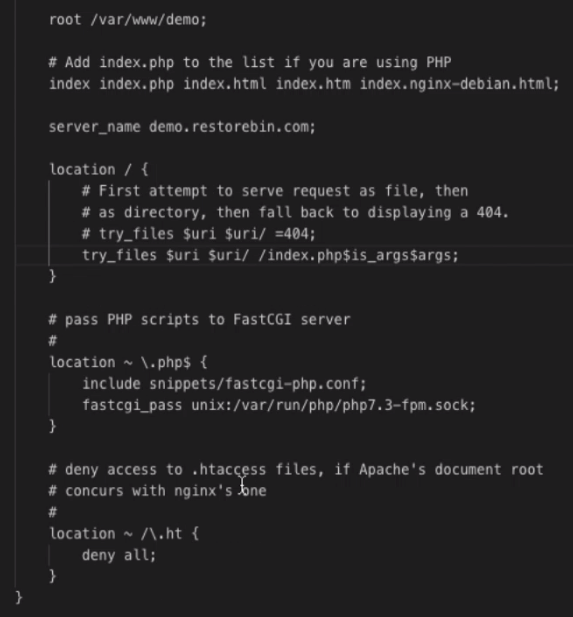
And make the following changes so that our configuration file will finally look as below:
server {
    listen 80 default_server;
    listen [::]:80 default_server;
    root /var/www/demo;
    index index.php index.html index.htm index.nginx-debian.html;
    server_name demo.restorebin.com;
    location / {
        try_files $uri $uri/ /index.php$is_args$args;
    }
    location ~ \.php$ {
        include snippets/fastcgi-php.conf;
        fastcgi_pass unix:/run/php/php7.4-fpm.sock;
    }
    location ~ /\.ht {
        deny all;
    }
}
That’s it; close and save the editor (Ctrl+C) and restart the Nginx webserver.
sudo nginx -t
sudo service nginx restart
You can refer to this section for a complete guide to configuring Nginx virtual host for WordPress setup.
Configure WordPress on the DigitalOcean cloud
Download the latest version of WordPress locally in the /tmp/ folder on the Cloud server using the command line:
cd /tmp
curl -LO https://wordpress.org/latest.tar.gz
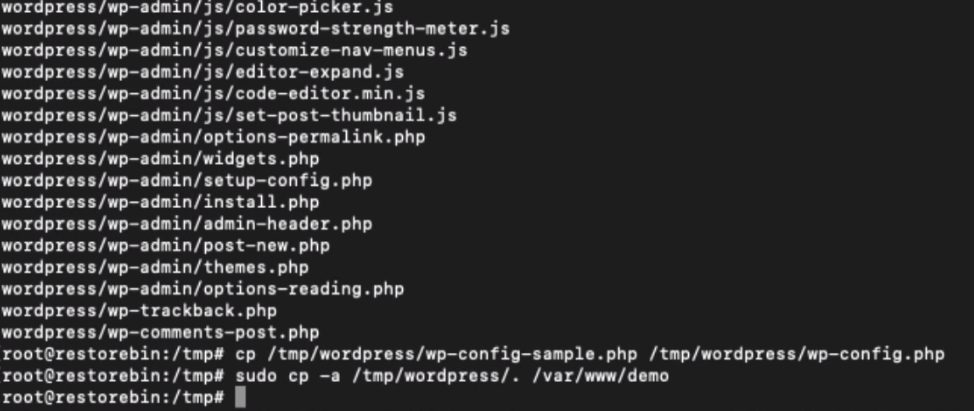
Extract the WordPress compressed file in the temporary folder and copy the sample configuration file to create a new WordPress wp-config.php file.
tar xzvf latest.tar.gz
cp /tmp/wordpress/wp-config-sample.php /tmp/wordpress/wp-config.php
Now let’s copy the entire extracted WordPress files into our public folder /var/www/demo using the following command:
sudo cp -a /tmp/wordpress/. /var/www/demo
Now that we have copied all the WordPress folders to the root directory let’s change the ownership so that WordPress will automatically make the required changes on the file and folder system without our explicit permission.
sudo chown -R www-data:www-data /var/www/demo
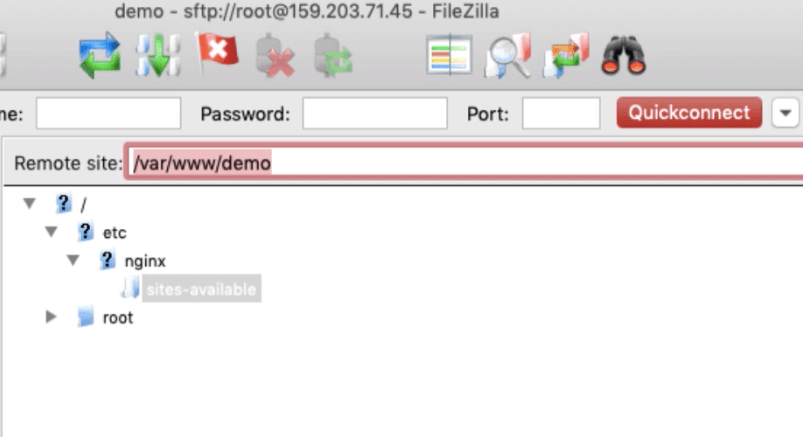
Next, edit the wp-config.php file to add the MySQL credential details and install WordPress. You can log in cloud server via SFTP using FileZilla.
Open the WordPress configuration file in SFTP client FileZilla located in /var/www/demo/wp-config.php and follow the steps:
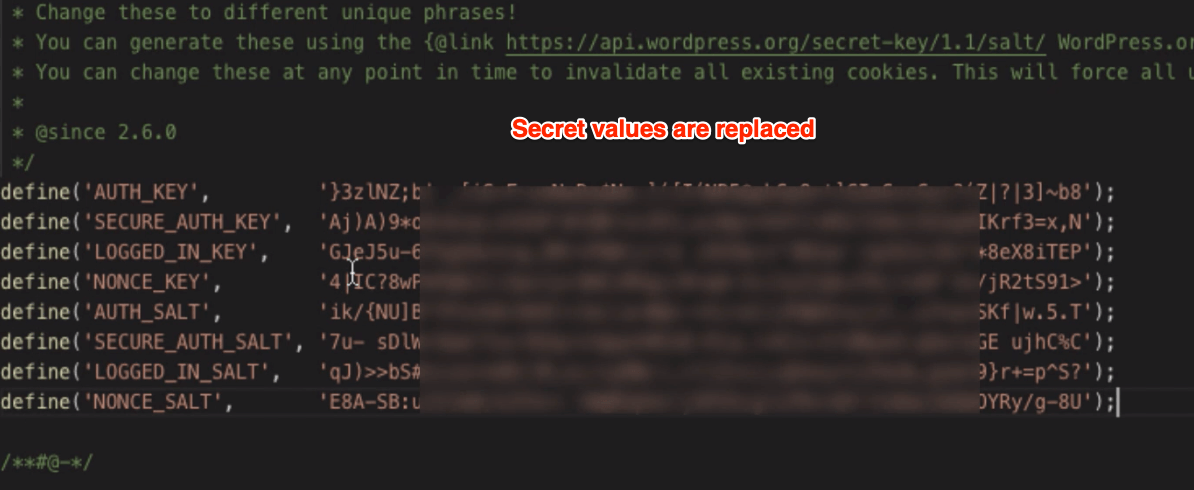
Generate the secret key using WordPress secret key generator in SSH:
curl -s https://api.wordpress.org/secret-key/1.1/salt/
You will get the unique values that need to replace dummy values already present in the wp-config.php file.
Next, we must modify the database value to reflect our MySQL database details.
. . .
define('DB_NAME', 'wpdatabase');
/** MySQL database username */
define('DB_USER', 'wpuser');
/** MySQL database password */
define('DB_PASSWORD', 'wppassword');
. . .
Finally, allow WordPress to write to the file system by defining the FS_METHOD in the wp-config.php file by adding the following snippet:
define('FS_METHOD', 'direct');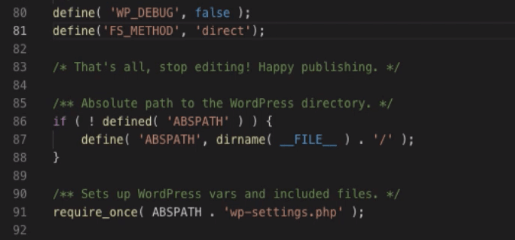
Save the file, and upload it back to the SFTP server. Finally, reboot the Ubuntu Server to commit all the changes made.
reboot
Refer to this section for an advanced WordPress wp-config.php file configuration.
Install WordPress and set up login credentials
We’ve now completed the entire necessary backend setup for WordPress. Let’s proceed with installing the WordPress CMS in our favorite web browser.
Access the domain name in chrome or whatever browser you’ve:
http://www.your-domain-name.com
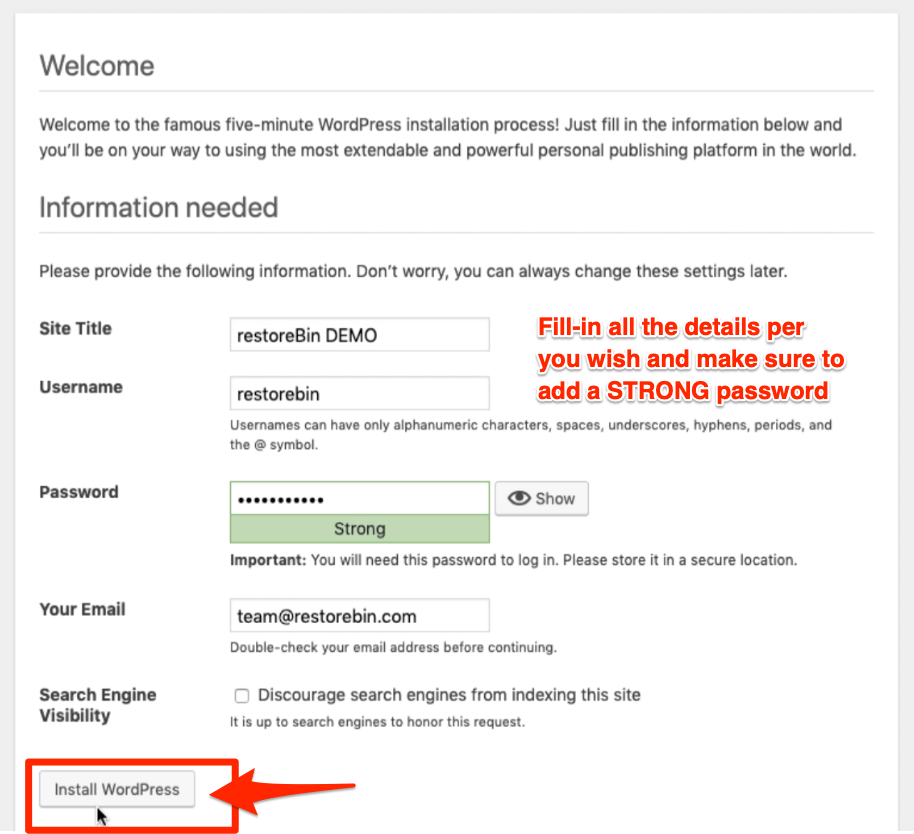
Select the preferred language and the administrator username-password along with an email address.
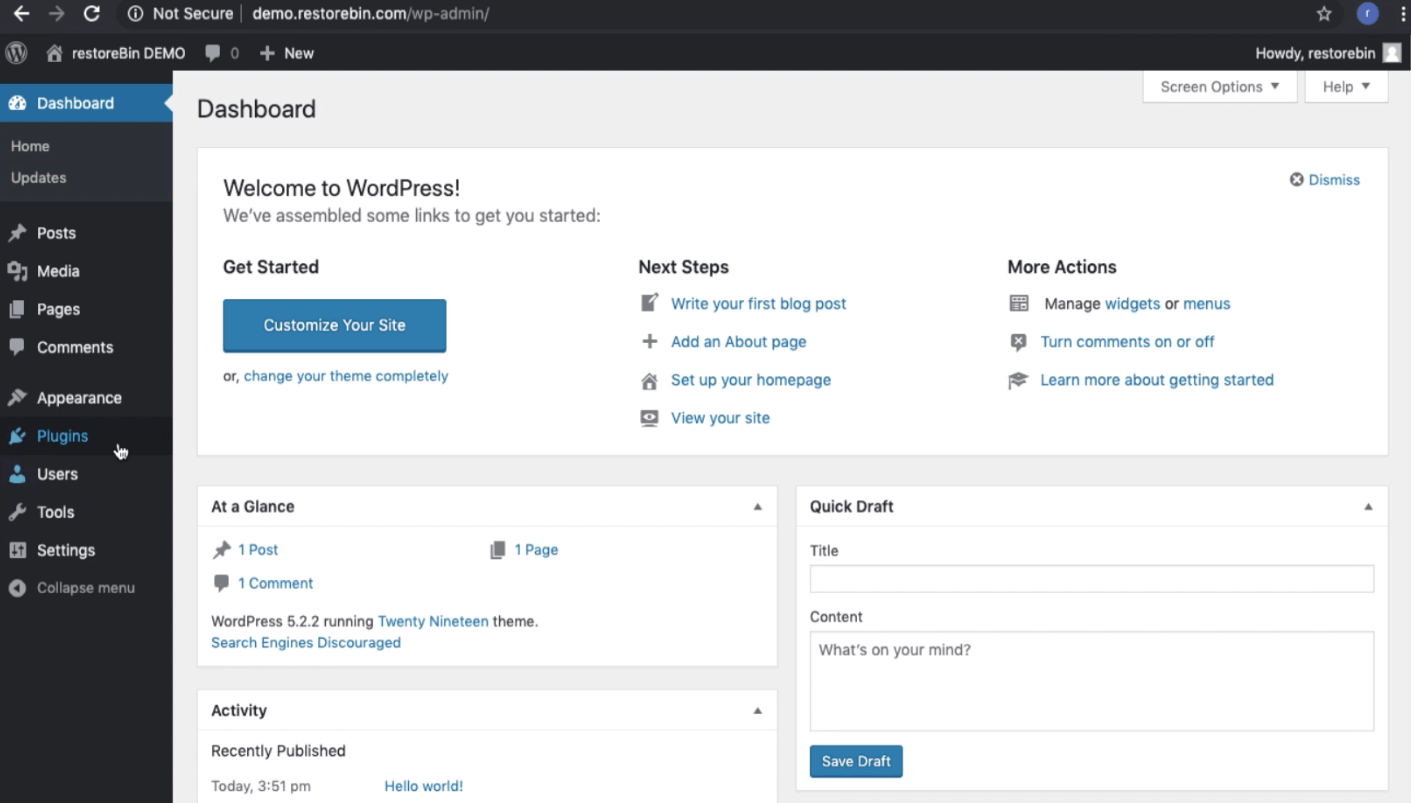
Finally, hit on [Install WordPress] button to complete the installation online. Login to your fresh WordPress installation using the above credentials to access the dashboard for the first time.
Watch the complete video demo tutorial on installing WordPress on LEMP Stack:
Advanced Guides for WordPress on DigitalOcean
Now that you’ve successfully installed WordPress on DigitalOcean, you can follow these advanced guides to improve your installation.
- Install basic WordPress Plugins and Setup
- Set up Let’s Encrypt for a secured connection
- Setup free Image CDN for WordPress
- Setup free CSS and JS file CDN on WordPress
- Setup WordPress SEO with Rank Math plugin
Bottom Line:
I hope the guide has been beneficial to you. However, let me know if you faced any issues or found something missing in the tutorial.
I’d be happy to acknowledge and make the correction.

What about FastCGI cache with Nginx, you don’t like it? Also SlickStack is saying that MySQL 8.0 is not stable yet (and not faster than MySQL 5.7 yet for most websites)….. thoughts on that?
Gave app
Can I able to add multiple websites using your this guide
Yes, that should work without any issues.
I’m getting error at this “sudo apt-get install software-properties-common python-software-properties”
error – Package python-software-properties is not available, but is referred to by another package.
This may mean that the package is missing, has been obsoleted, or
is only available from another source
However the following packages replace it:
software-properties-common
E: Package ‘python-software-properties’ has no installation candidate
installing software-properties-common will suffice the need.
I am getting command not found for
“sudo mysql_install_db” ?
Also Prev command to this i was not asked to create a sql server root password?
I answered my own question. That command was obsolete on that version MySQL. So moved on to next command and all went well. Completed the backend configuration.
hi dear am very very thankful to you for this post,
i am following you last 6months ago and i have done aws server EC2 Ubuntu 20.04 with nginx worpress ,
its working great and before i have zero knowledge to setup lemp stack server,now i can manage by my self with your posts ,and i have done by self nginx fast cgi cache ,ssl,gzip fail2ban server,
once again thank you
Hi,
Very helpful post. Keep it up.
Also, please also share a tutorial on how to migrate existing WordPress website from shared hosting to digitalocean Ubuntu LEMP stack droplet….
Hey,
Can you please make a video for amazon aws ?