It’s essential to make your site looks great. Not just for the sake of branding but User Experience and Engagement. That’s where we will be using the WordPress Appearance settings.
The crapy looking site with great content might perform well, but the good looking site with great content will even perform better.
In the following article, we will touch base on changing the WordPress themes, creating the Menu links for navigation, and adjusting the Widgets in the sidebar and footer sections.
By the way, WordPress Appearance also can edit the theme files using a built-in powerful Theme Editor.
If you’re following our #WordPressBlog series, this is the third article and video demo. I previously published the WordPress login and necessary preliminary setup.
Let’s dive into using the WordPress Appearance settings —
What is the WordPress Appearance?
The Appearance tab in the WordPress dashboard helps change your blog’s look and feel. The Appearance allows customizing the skin with unlimited available free themes and templates.
You can customize the background color or add header images along with the site branding logo and favicon from WordPress Appearance settings.
The WordPress Appearance helps create the top bar menu links and adjust the sidebar or footer widgets on your blog.
WordPress also has the built-in Theme Editor used for customizing the theme or template per your needs.
How to change WordPress Themes?
Every year or two WordPress community releases a theme with a significant update. This theme is added as a pre-installed with a new WordPress installation.
You can change to any other theme that you desire. WordPress itself has tonnes of Free Themes in its repository. These free themes are community developed and can be used on any site. You can even upload the premium theme bought from any seller.
Follow the steps to change the WordPress theme for free:
- Login WordPress dashboard
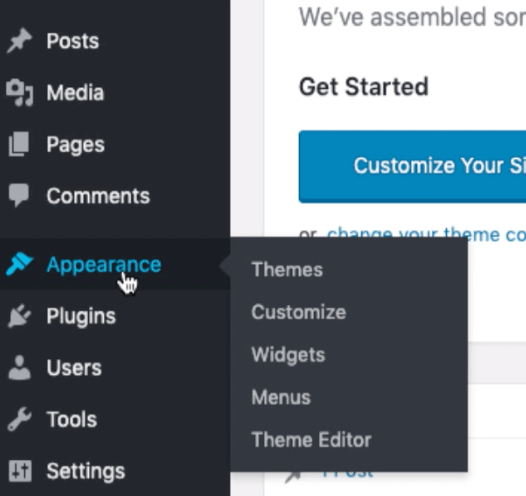
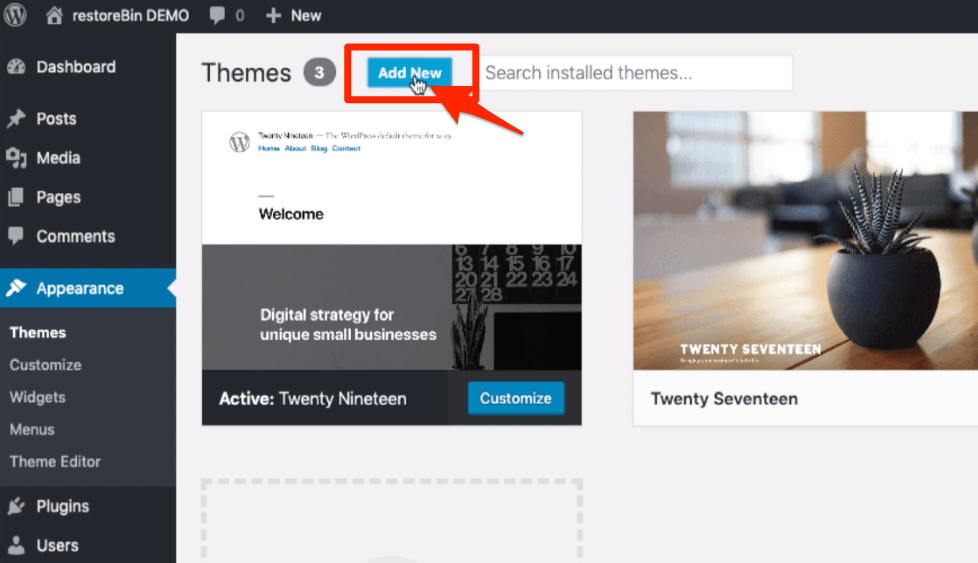
- Navigate to Appearance > Themes sub-menu
- Click on Add New button at the top
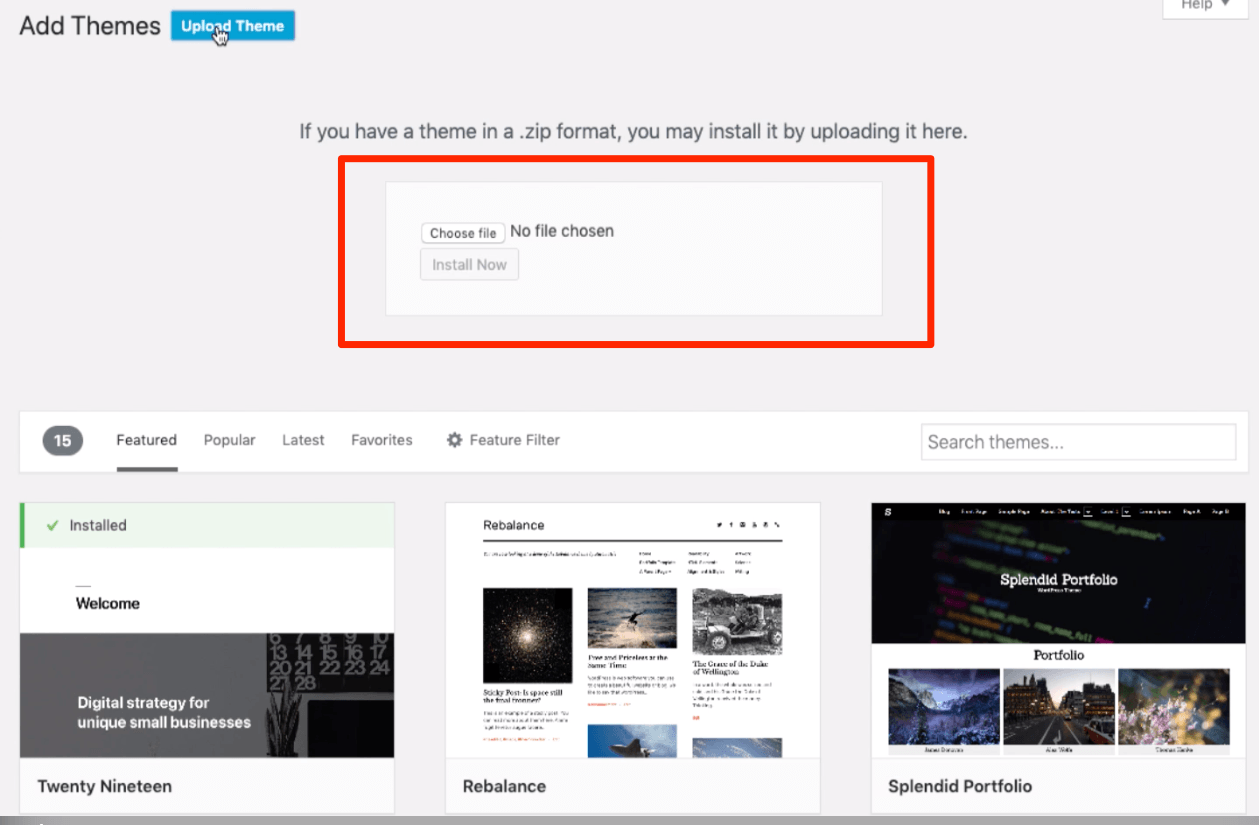
- Search and select the theme from the WordPress repository to install, OR you can even Upload the theme from a local computer.

- Preview and Activate the Theme
- Visit your blog to see the new WordPress theme
Make sure that the newly installed theme doesn’t break your site. Visit posts, pages, and menu links to see if everything is intact.
Sometimes, changing the themes will modify the Menu links and Widgets, so make sure you re-adjust the same.
Adding Menu links in the WP Header
Menu links are used for quick navigation and to define the most valuable blog pages you want your users to click.
Based on the theme structure you’ve used, we can place the Menu links in the top bar, footer, or sidebar.
I prefer adding the Menu links in the top bar because it’s the position on the webpage where you can catch most eyeballs. Even on the restoreBin, we have placed the Menu links in the header top bar.
Follow the steps to add and place the Menu bar in WordPress Appearance settings:
- Login WordPress Dashboard
- Navigate to Menu options by hovering on the Appearance tab
- Give a name to the Menu list, say “Topbar.”
- Select the Links from the available list of Post, Pages, or Categories from the left pane
- You can even add the Custom Links
- Reorder the Menu Links list
- Select the Display location as “Primary Menu” for placement
- Hit on the Save Menu command button
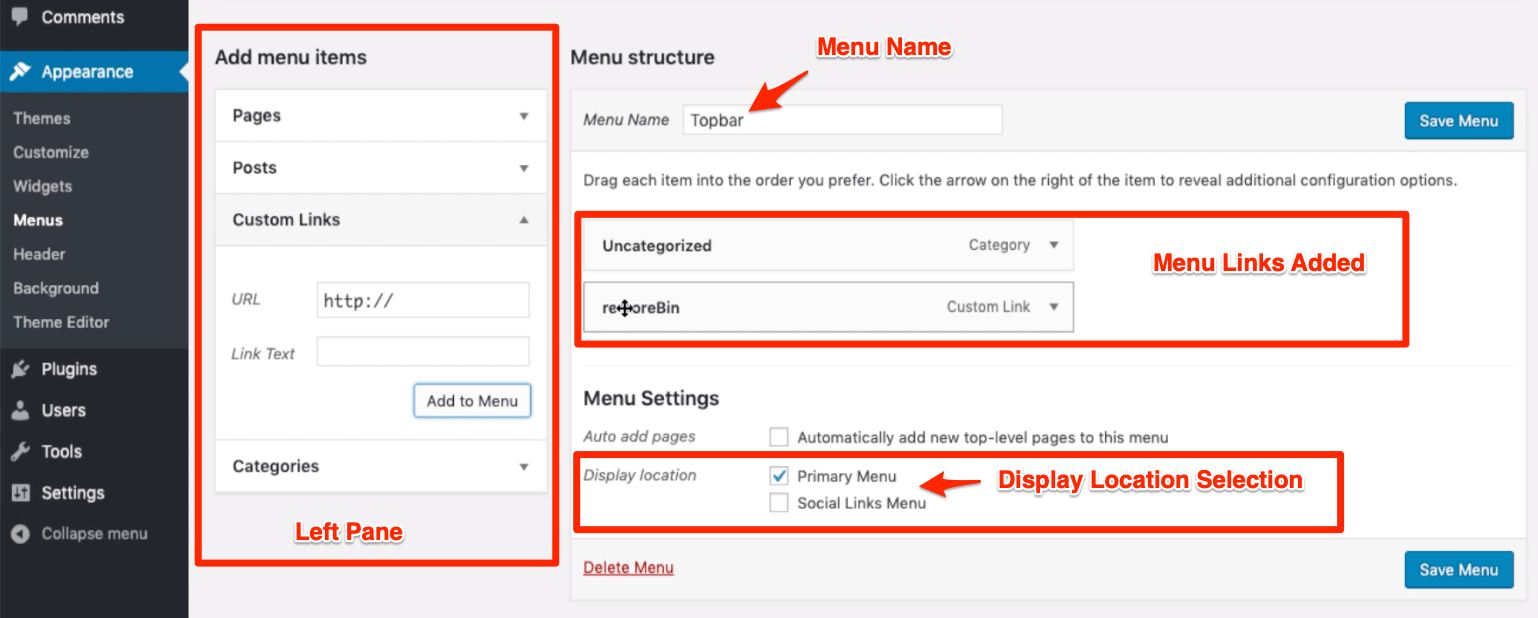

- Visit the Blog to watch the new Navigation Menu on the Topbar

Similarly, you can create a list of multiple Menu links and add them to the Footer bar or even in Widgets as Page Menu Links.
Add or Remove Widgets from WordPress
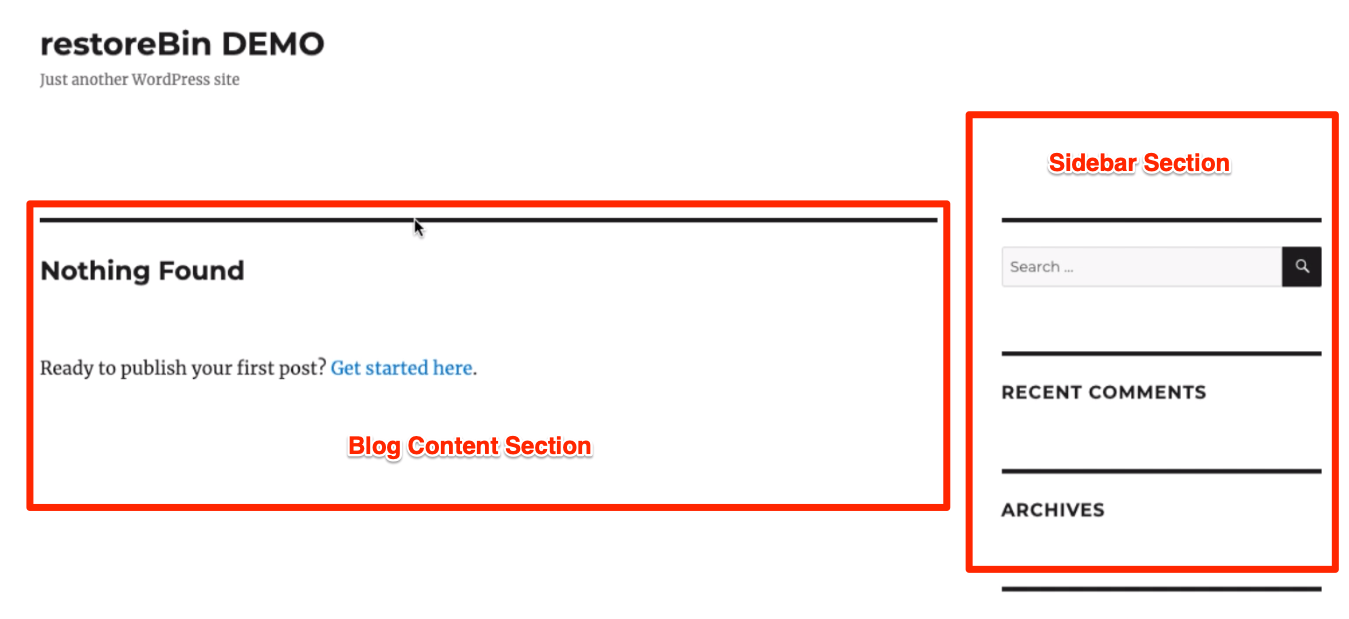
Widgets are a super easy and helpful mini-tool to add the content, links, and advertisements in the sidebar and the footer bar.
You can drag-n-drop any Widget from the available list into the sidebar or footer section. When you save the widget, it will be visible on the blog. The widgets are also a great way to help user navigation.
You can add the most popular or recent posts, social follow buttons, email subscription forms, and many other features.
Follow the steps to add a WordPress widget in the sidebar:
- Login WordPress Dashboard
- Hover on the Appearance menu and select Widgets from the list
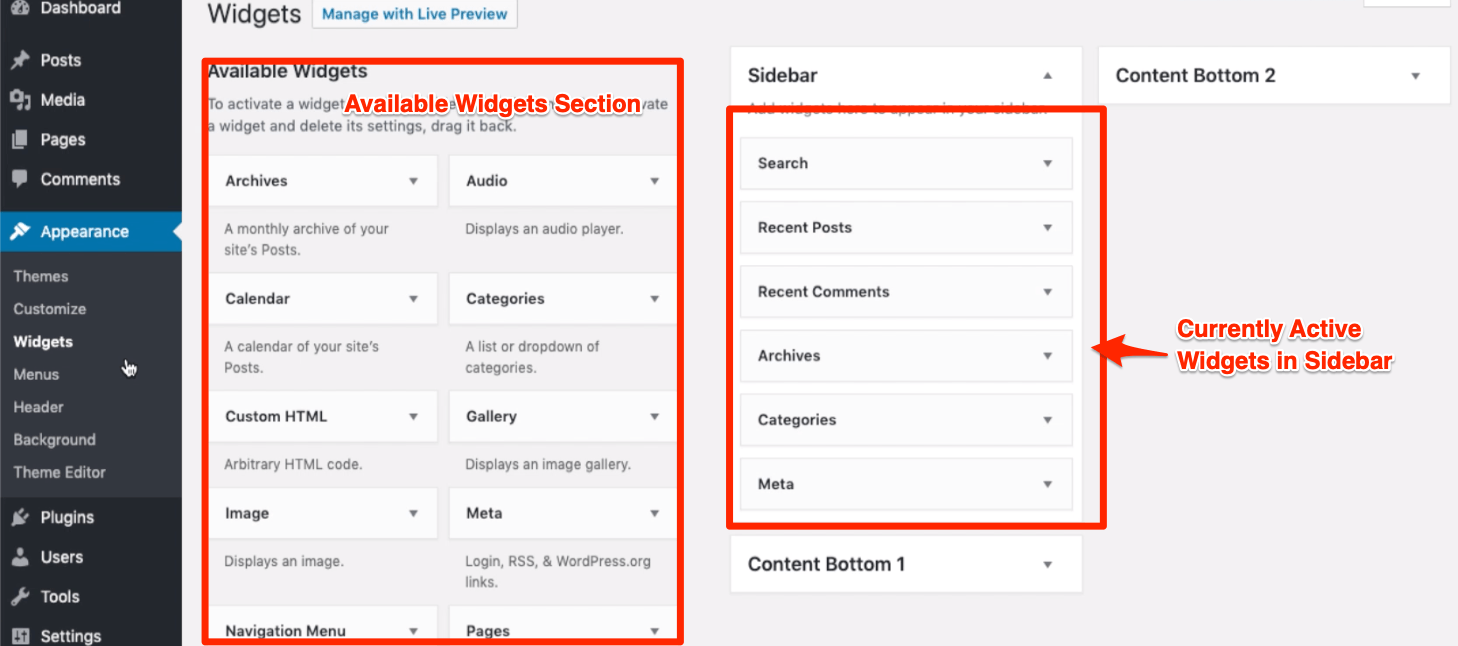

- Select the Search widget from the available list, and add into Sidebar
- Hit on the Save button in the sidebar after adding
- Launch your blog to see if the search widget bar is appearing in the sidebar
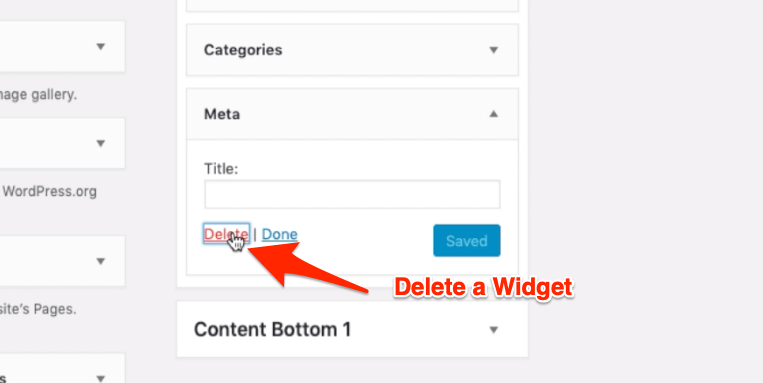
Similarly, you can add or delete multiple other Widgets from the available list. You can also add the HTML-based text to the sidebar via Widgets.
Customization using WordPress Customize
The primary reason why most (including myself) like WordPress is because of the granular level of customization. We can tweak WordPress at every inch, and it’s most flexible in development.
You can customize WordPress to run as an e-commerce site, membership forum, social networking site, and blog.
There are tonnes of customization opportunities in WordPress using Plugins. However, we can still adjust the site with the in-built customization we already discussed, like Themes, Widgets, and Menus.
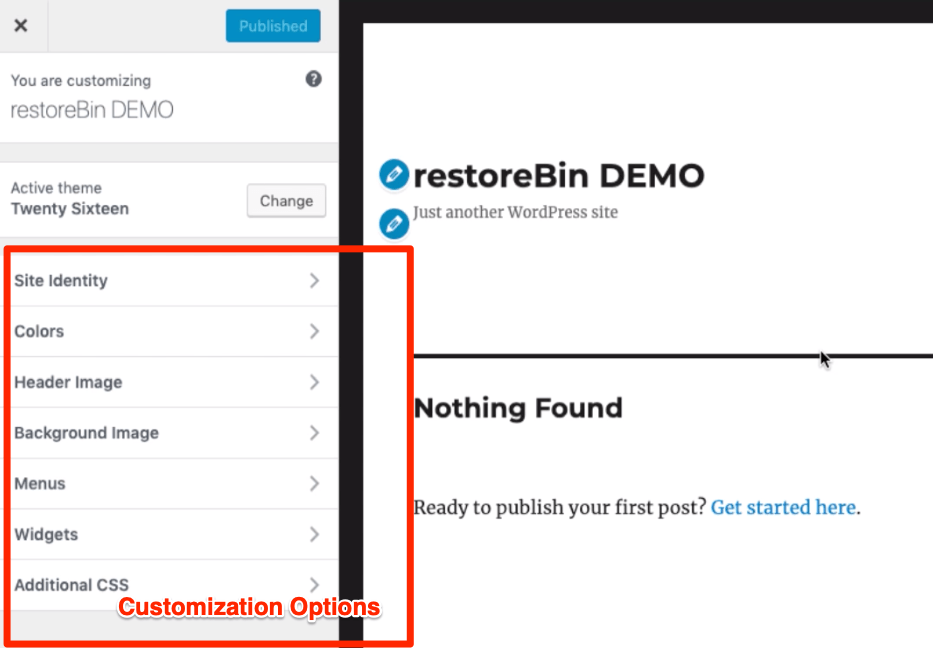
Couple of things you can do using the WordPress Customize option:
- Changing the Site Name and Description, also adding the site icon — favicon
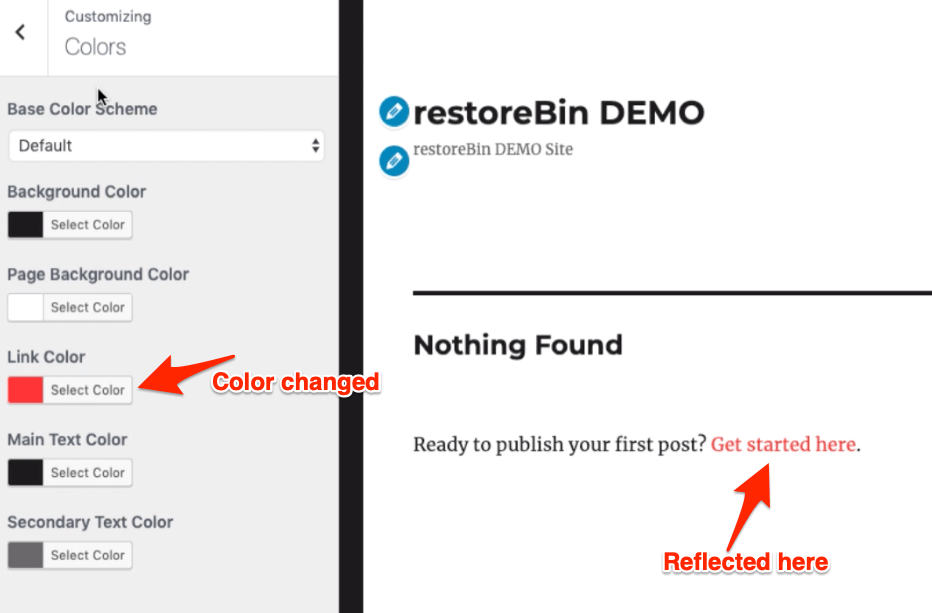
- Adjusting the Text, Links, and Background Colors

- Changing the Header and Background Image
- Adjusting the Menu and Widgets
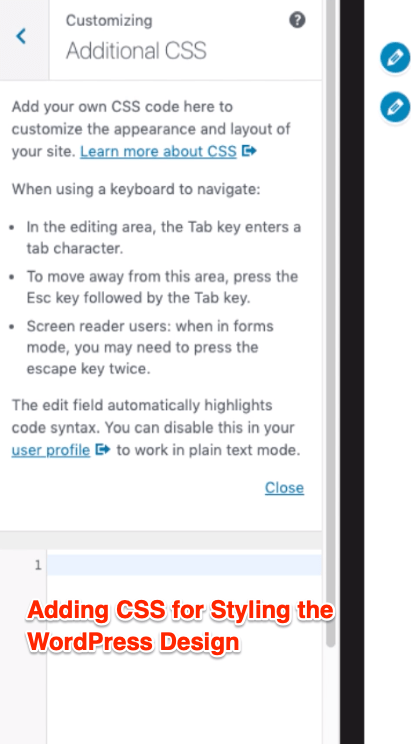
- Modifying the design using Additional CSS
Video guide in WordPress Appearance Settings
Watch the video on how to customize the WordPress Skin and add the brandable logo. You can also learn how to create the Menu Links and adjust the Widgets in WordPress.

I hope you liked the video demo; please subscribe to our channel for more such videos.
What’s next in the #WordPressBlog series?
This article teaches you how to customize the WordPress look and feel. In the following article, we will be catching up with adding and improving the backend features using WordPress Plugins.
Just link themes; WordPress has unlimited Plugins or extensions that enhance features and capability. We will cover some essential but very important plugins in the following articles.