Having an SSL certificate on the domain name is essential. Thankfully, we can generate and add a free SSL certificating using Let’s Encrypt for Nginx.
The certificate shows the credibility of the website. It also helps improve search engine ranking as Google has decided it as one of the ranking factors.
In this article, we will be learning how to install and set up Let’s Encrypt for Nginx using the Certbot program. This will help us enable the security certificate to the domain address and request the secured HTTP request.
If you’re unaware, this is the fifth article and video demo of the #CloudServer series. We recently published how to install and configure Postfix with Gmail SMTP relay for SEND-only action.
Let’s dive into the topic by installing and configuring Let’s Encrypt with Nginx webserver —
What is Let’s Encrypt?
Per Wikipedia –
Let’s Encrypt is a non-profit certificate authority run by Internet Security Research Group that provides X.509 certificates for Transport Layer Security encryption at no charge.
The certificate is valid for 90 days, during which renewal can occur at any time. We can generate the certificate using a program called Certbot which will also help with automatic renewal 30 days before expiration.
The SSL certificate is 100% free and forever!
Pre-requisite for LetsEncrypt Nginx
Before we start installing LetsEncrypt, we need to ensure that our Nginx configuration is correctly set. The certbot program directly reads and writes into the Nginx file.
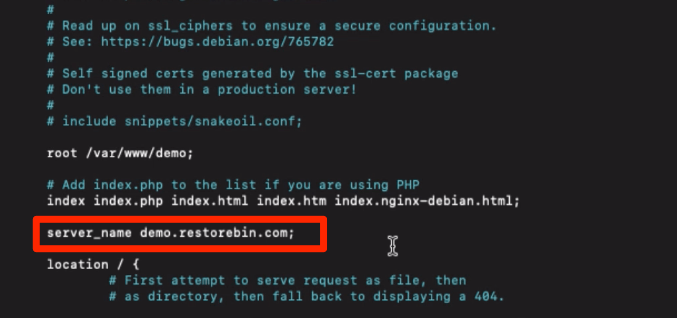
The critical setup we need to make is to have server_name set to the domain name. Since we have set up the LEMP stack to read from Nginx default file, we will verify the same.
Open the Nginx configuration file using nano editor:
sudo nano /etc/nginx/sites-available/default
Check if the server_name is set with your domain address. In my setup, it should be:
server_name demo.restorebin.com
If you’ve made the changes to reflect the server name to your domain address, then test the configuration file using the below command:
sudo nginx -t
If everything looks OK, restart the Nginx using the below command to commit the changes on the server.
sudo service restart nginx
Install Certbot for Let’s Encrypt
Now that we are all good with Nginx let’s start installing the LetEncrypt certificate on the server. As I mentioned, we will be using the Certbot program to manage the free SSL encryption.
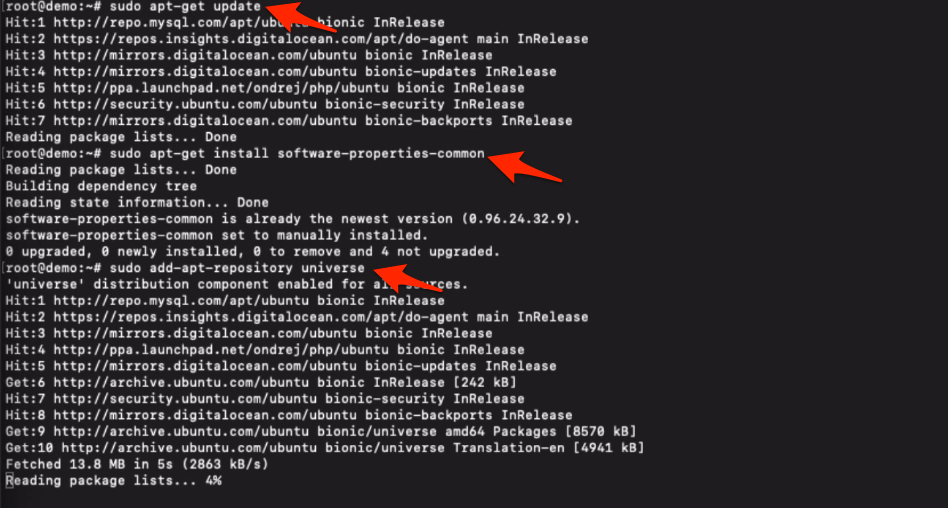
Let’s start with updating the repository and installing the pre-requisite software.
sudo apt-get update
sudo apt-get install software-properties-common
sudo add-apt-repository universe
Now add the certbot repository path to the apt to fetch and upgrade certbot in the future.
sudo add-apt-repository ppa:certbot/certbot
sudo apt-get update

Install the certbot program on the Ubuntu cloud using the below command.
sudo apt-get install certbot python-certbot-nginx
Once the installation is completed, run the below command to generate the certificate, this will also modify the Nginx blocks configuration file to enable the HTTP to HTTPS redirection along with updating live certificate locations.
sudo certbot --nginx -d example.com -d www.example.com
In my case, I will be installing a certificate only at demo.restorebin.com.
sudo certbot --nginx -d demo.restorebin.comYou’ll be prompted to enter a few details while generating the certificate specific to your domain name.
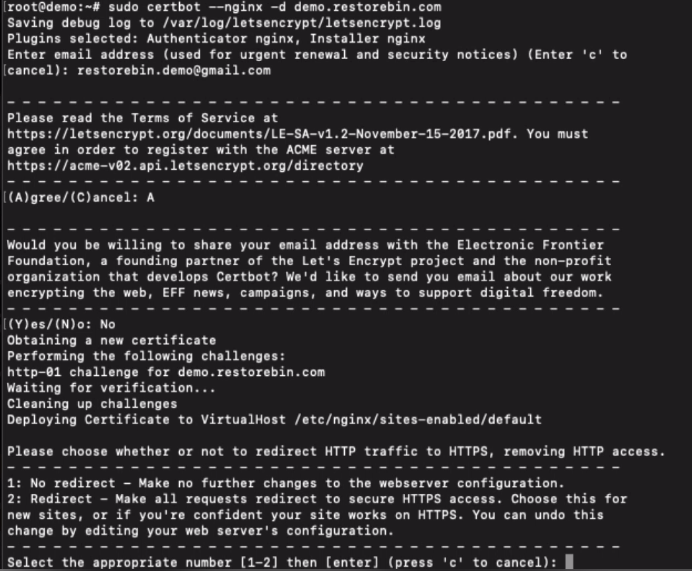
In the process, you will also be asked how to manage the HTTP traffic and provided with two options.
- No redirect – Make no further changes to the webserver configuration.
- Redirect – Make all requests redirect to secure HTTPS access.
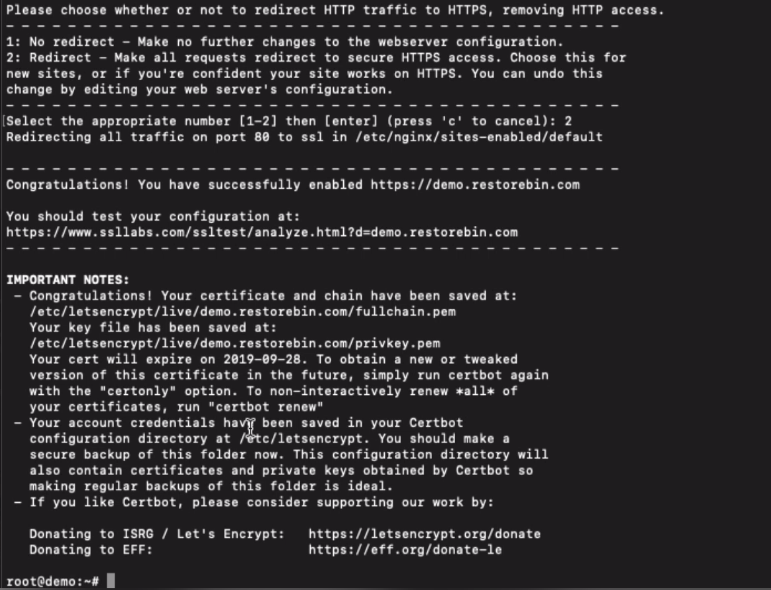
You should choose the second option to make the website or blog more secure and redirect HTTP traffic to HTTPS to avoid the duplicate content issue as HTTP & HTTPS versions.
Test Domain SSL Certificate
Once the certificate is generated successfully, you can test the authenticity and score at SSLLabs.com. Copy and paste the URL in the browser below, replacing your domain name.
For www.example.com at:
https://www.ssllabs.com/ssltest/analyze.html?d=www.example.com
For example.com at:
https://www.ssllabs.com/ssltest/analyze.html?d=example.comI will be testing the SSL certificate for demo.restorebin.com at the below URL.
https://www.ssllabs.com/ssltest/analyze.html?d=demo.restorebin.com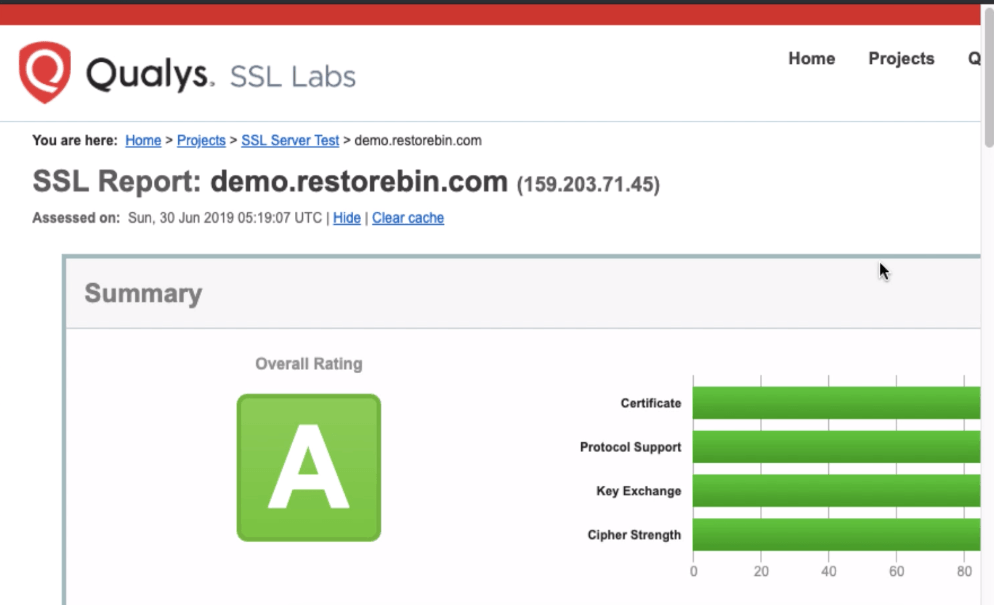
The test will take a few minutes to complete. It will check all the parameters and configuration, including in Nginx configuration.
Do not expect the SSL to be a perfect A+ score; we haven’t wholly configured the Nginx with an additional security setup. We will be covering that in the latter part of the series.
Renew LetsEncrypt Certificate for Nginx
Let’s Encrypt certificate issued for 90 days only. If we do not renew the certificate, it expires post 90 days. But thankfully, the certbot program can automatically renew the SSL certificate 30 days before expiration.
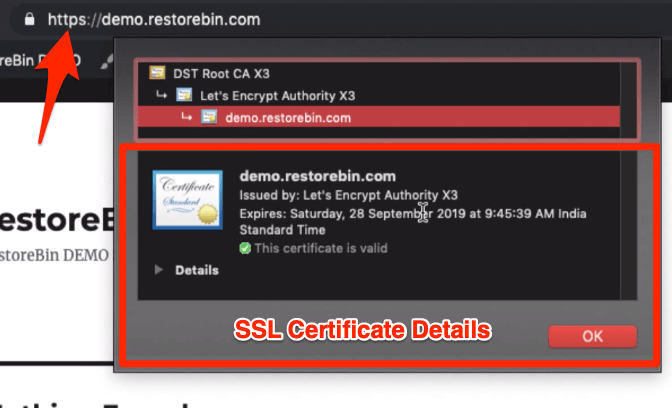
You can also check the certificate’s validity by hitting the padlock on the domain name and selecting the certificate.
When certbot is installed, it also adds a rule into CRON jobs to check the certificate validity daily.
We can check whether certificates need renewal by hitting the dry run command.
sudo certbot renew --dry-run
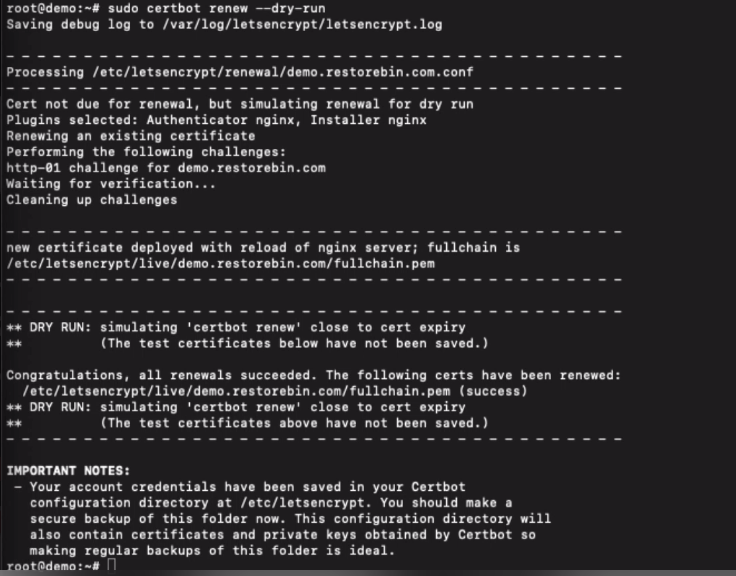
This command will stimulate the certificate renewal, however, do not update the existing certificates.
If you want to renew the certificate immediately, you can run the following command without dry run :
sudo certbot renew
You can also view the installed certificates for all the domains on your server using the below command:
sudo certbot certificates
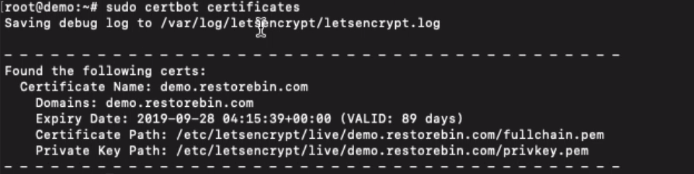
This will also display the information about the certificate’s expiration due date.
Watch how to configure Let’s Encrypt for Nginx
Watch a complete video demo on installing the LetsEncrypt program for Nginx and also test the domain’s SSL certification.
I hope you liked the video; please subscribe to our channel for more updates.
What’s next in the #CloudServer series?
I hope this article was helpful; next, we will cover how to secure our Ubuntu cloud server using Firewall. We will install and configure the UFW program for firewall security.
A great firewall will protect the server from getting hacked, thanks to an in-build UFW firewall that works excellent.